NotebookLM
Getting Started with NotebookLM
Welcome to the Getting Started page! This page will walk you through the simple steps to gain access to NotebookLM account. Whether you're logging in for the first time or troubleshooting access issues, you'll find everything you need to get started and unlock full access!
Activate Your Account
In this section, you'll find quick guides tailored to your current access type. Whether you're a new user or have an existing account these step-by-step instructions will help you easily gain access based on your specific situation. Please note, that at this time NotebookLM is only being offered to Fresno State staff and faculty.
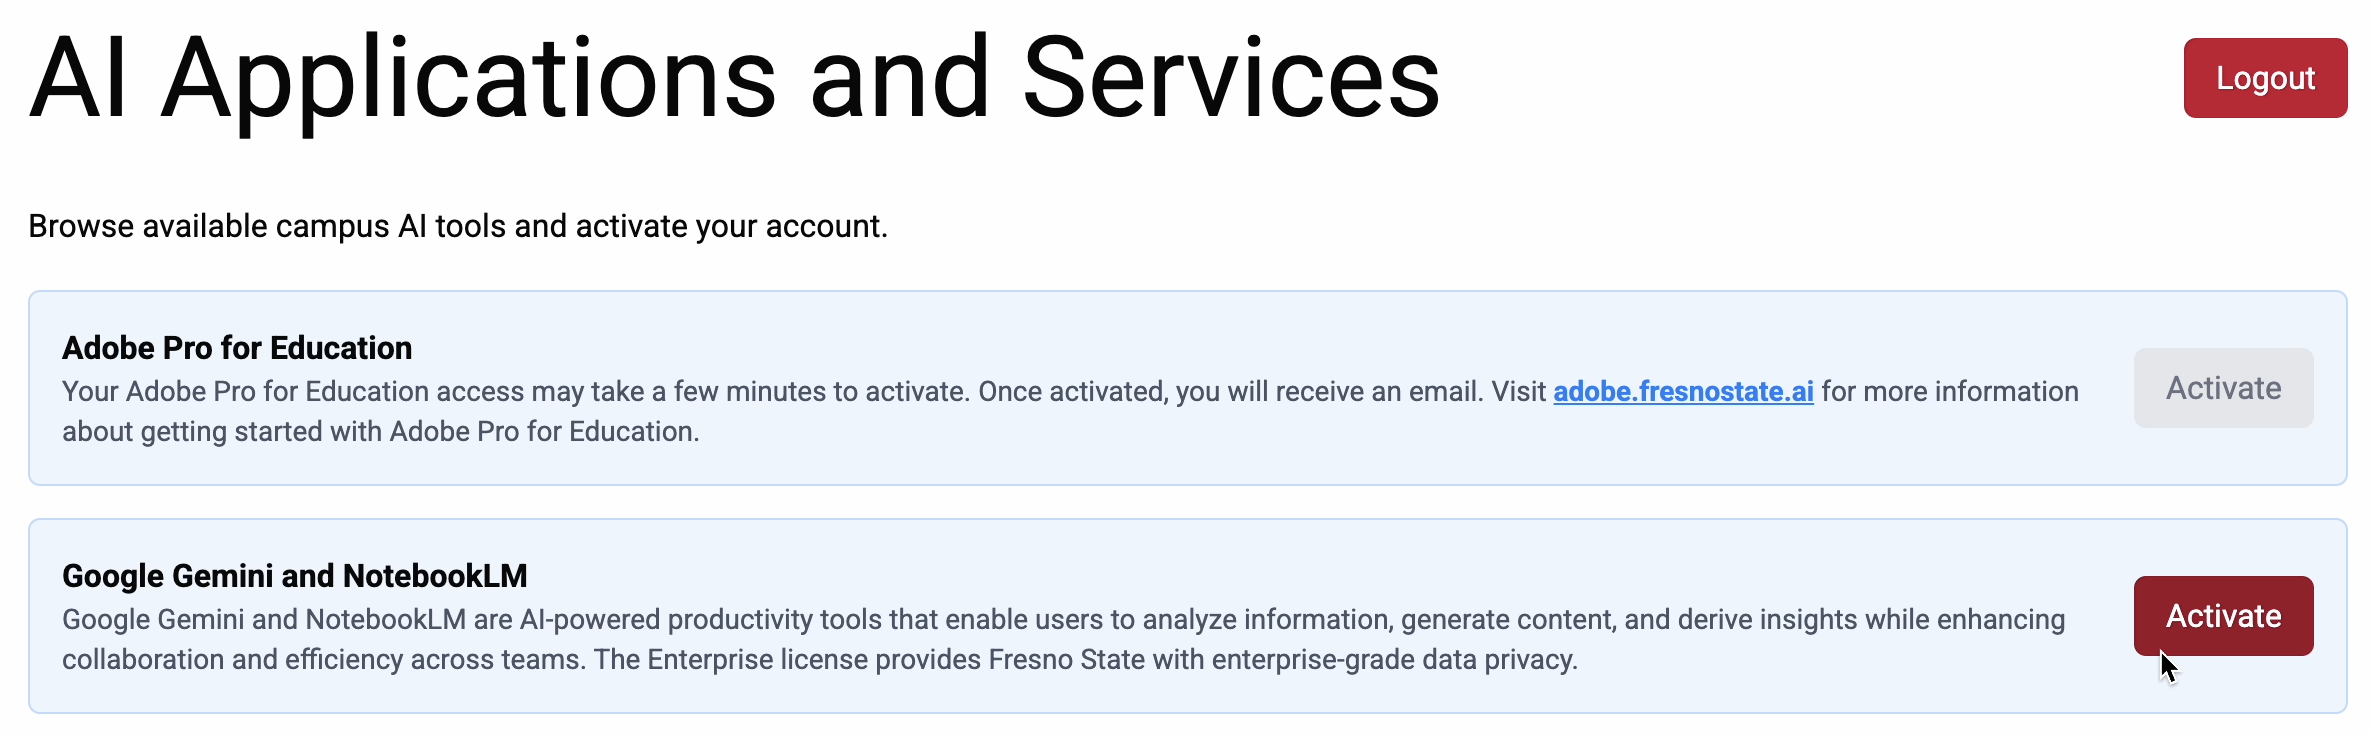
1. First, go to the Fresno State AI Tools Self-Service Portal. Click the Login button to begin.

2. You will be directed to the Campus Login Services page. Enter your Fresno State username and password, then click Login.

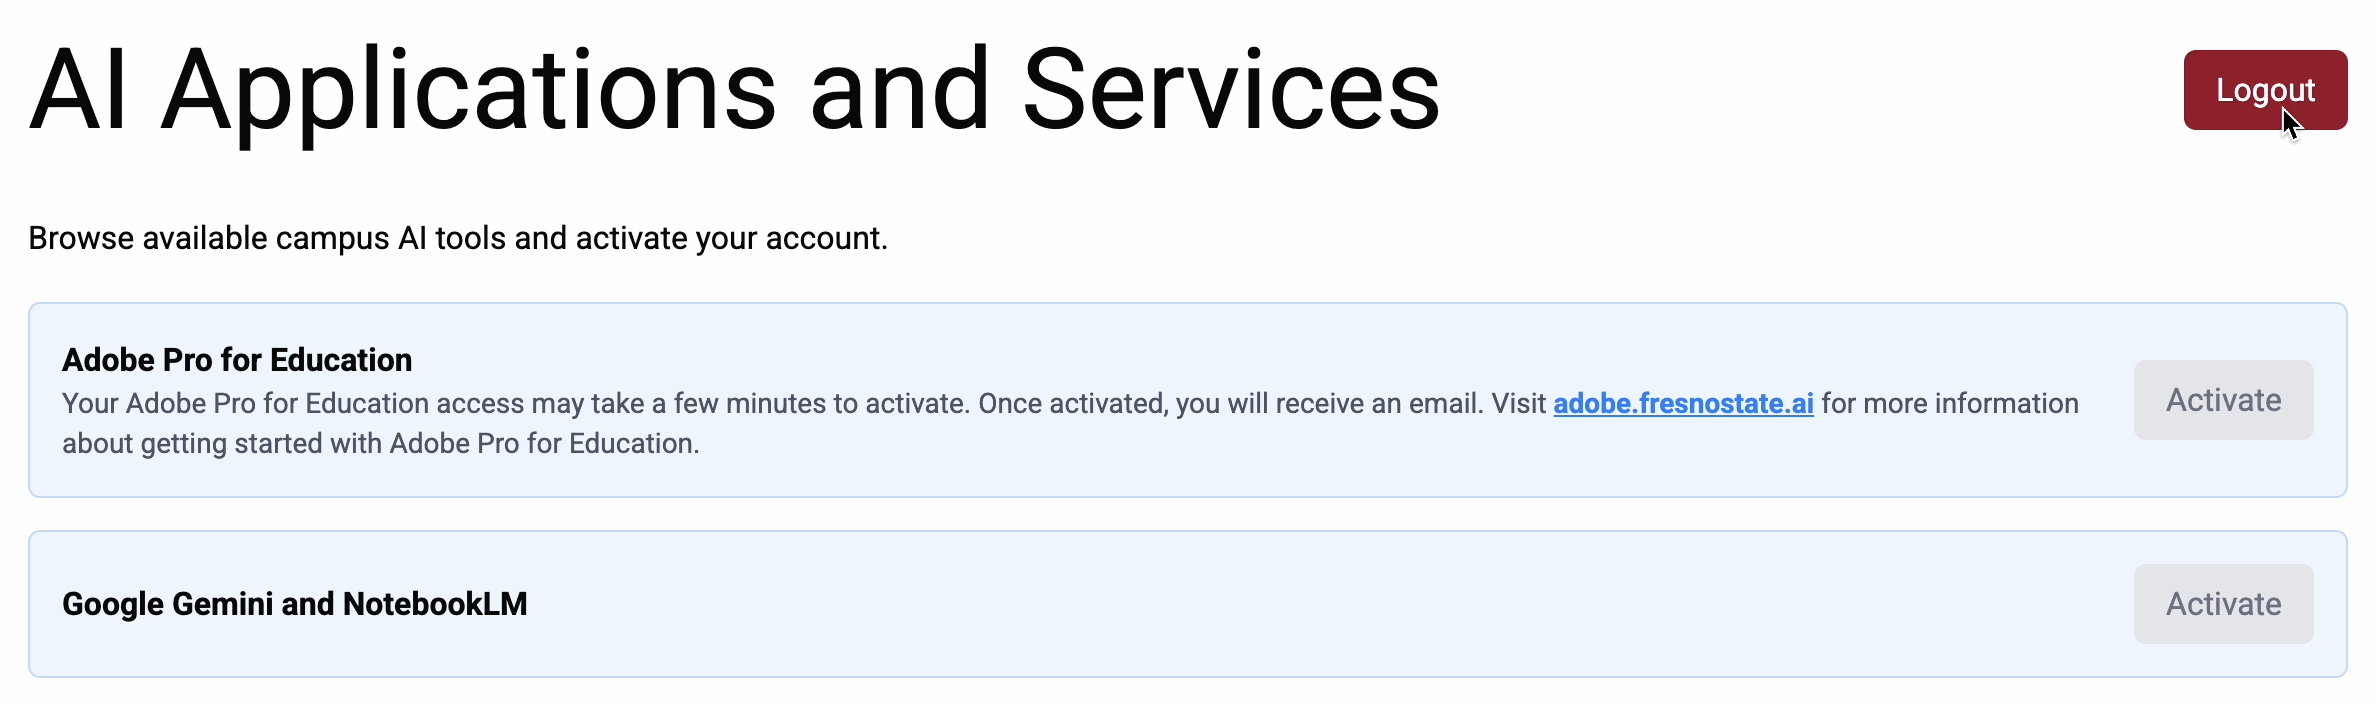
3. You will see a list of AI tools available to you. Find Google Gemini and NotebookLM and click the “Activate” button.
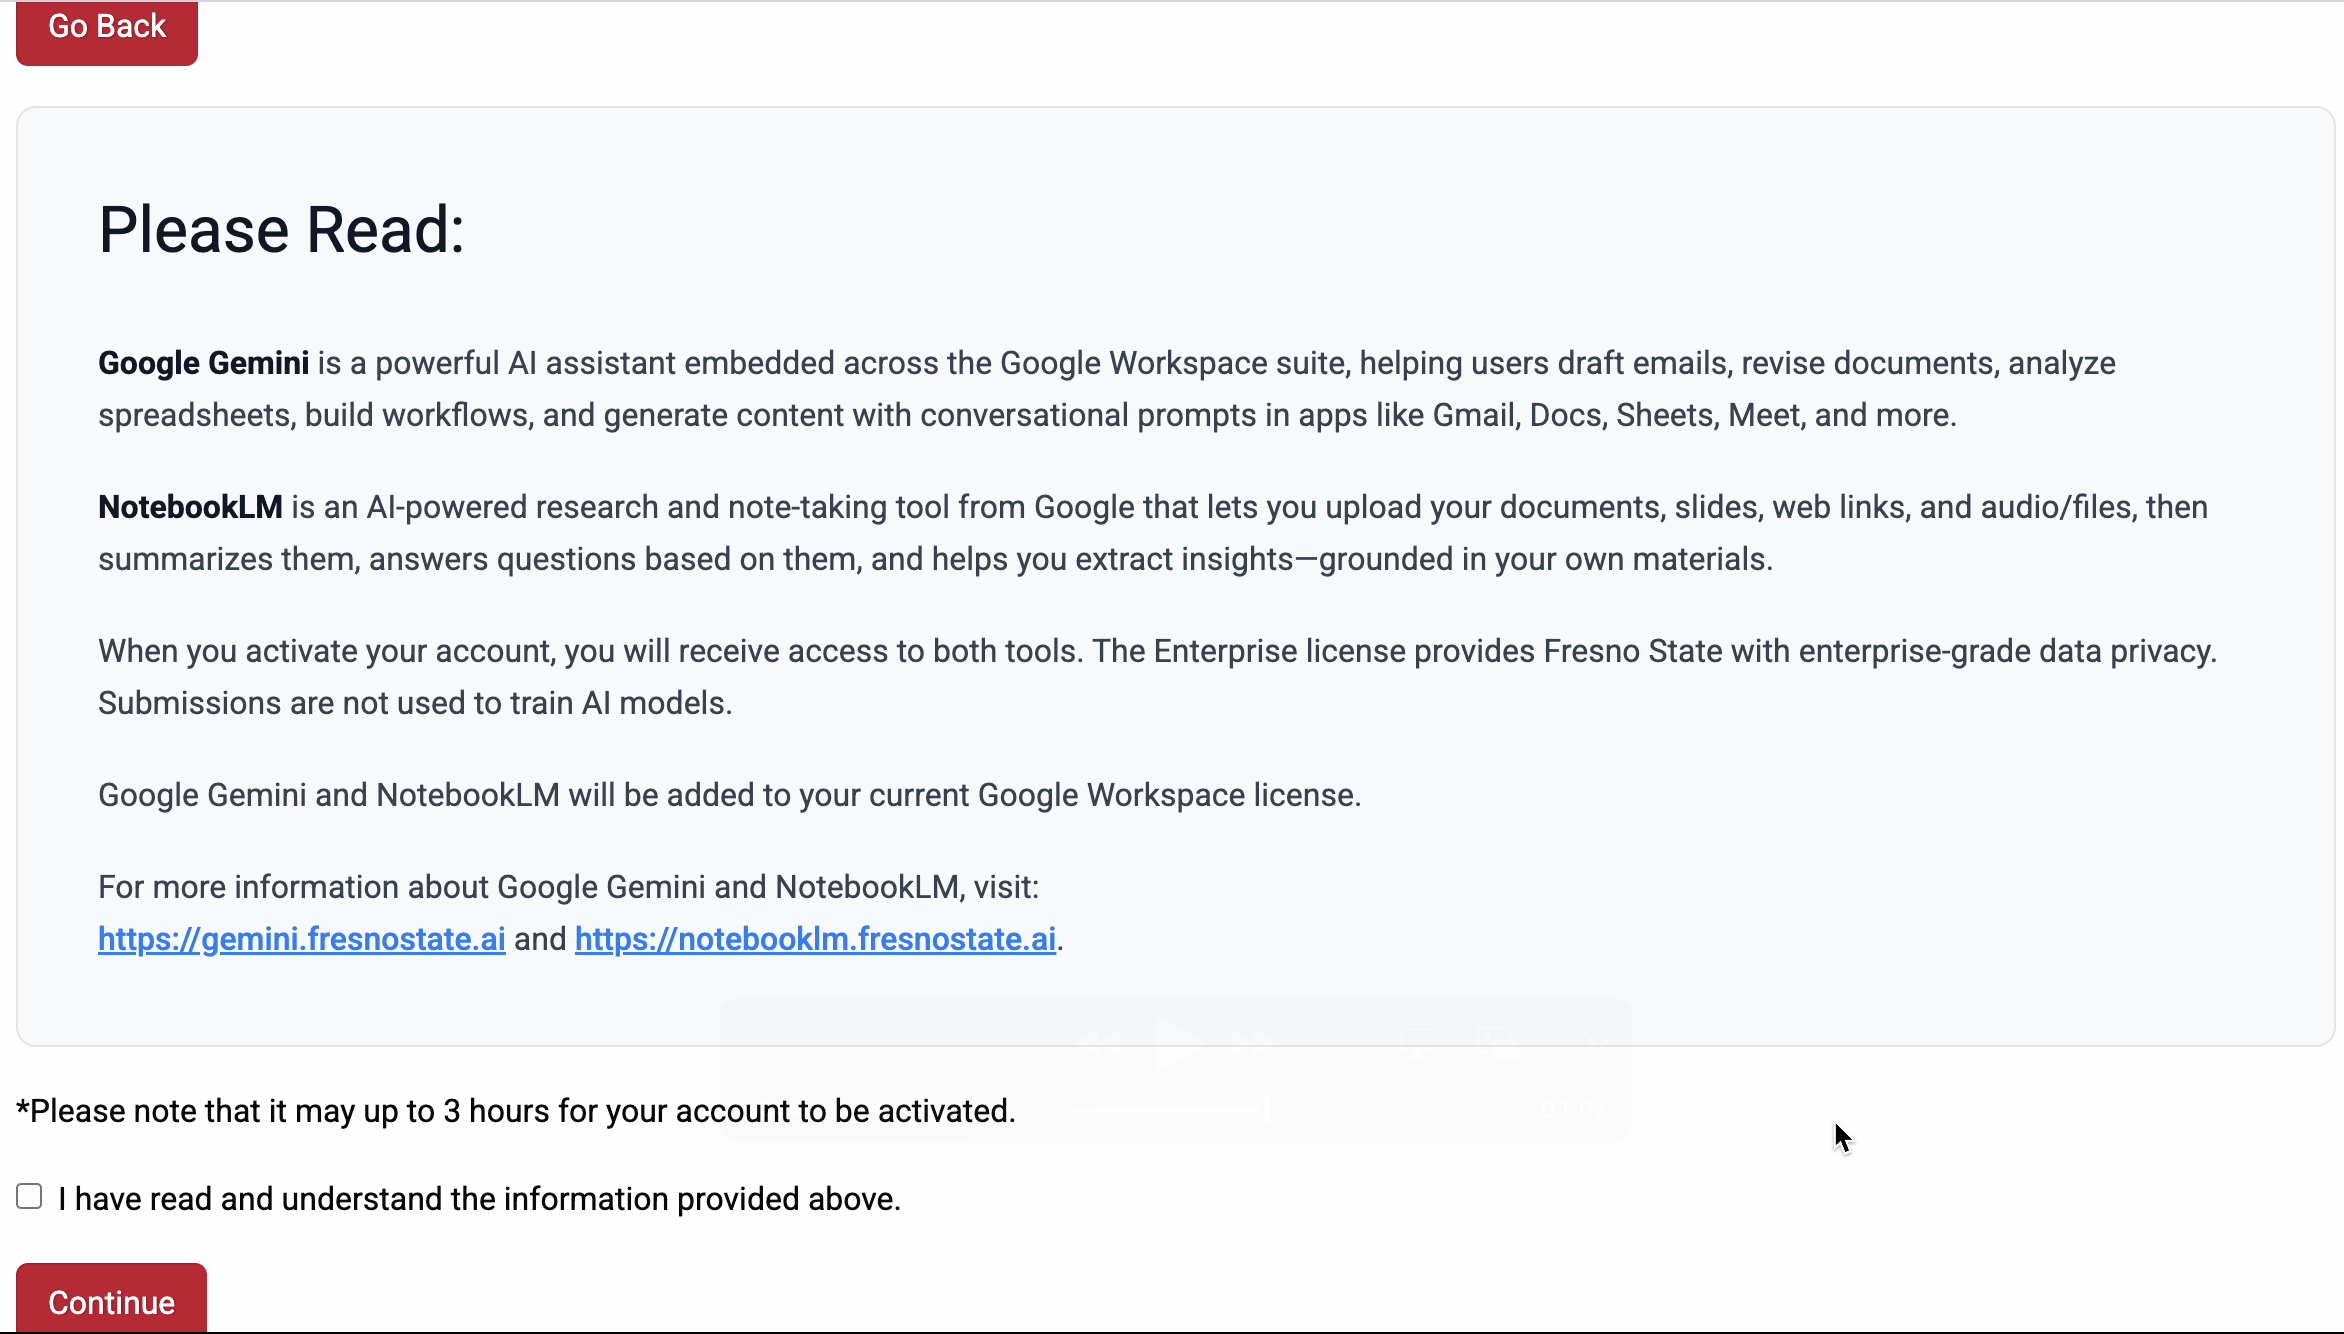
4. Please review your account options. You will receive both tools - Google Gemini and NotebookLM. Once reviewed, check the "I have read and understand the information provided above" box and click Continue.
5. You will see a message confirming your account was successfully activated. Click “Go back to AI Applications and Services” to return to the main dashboard.
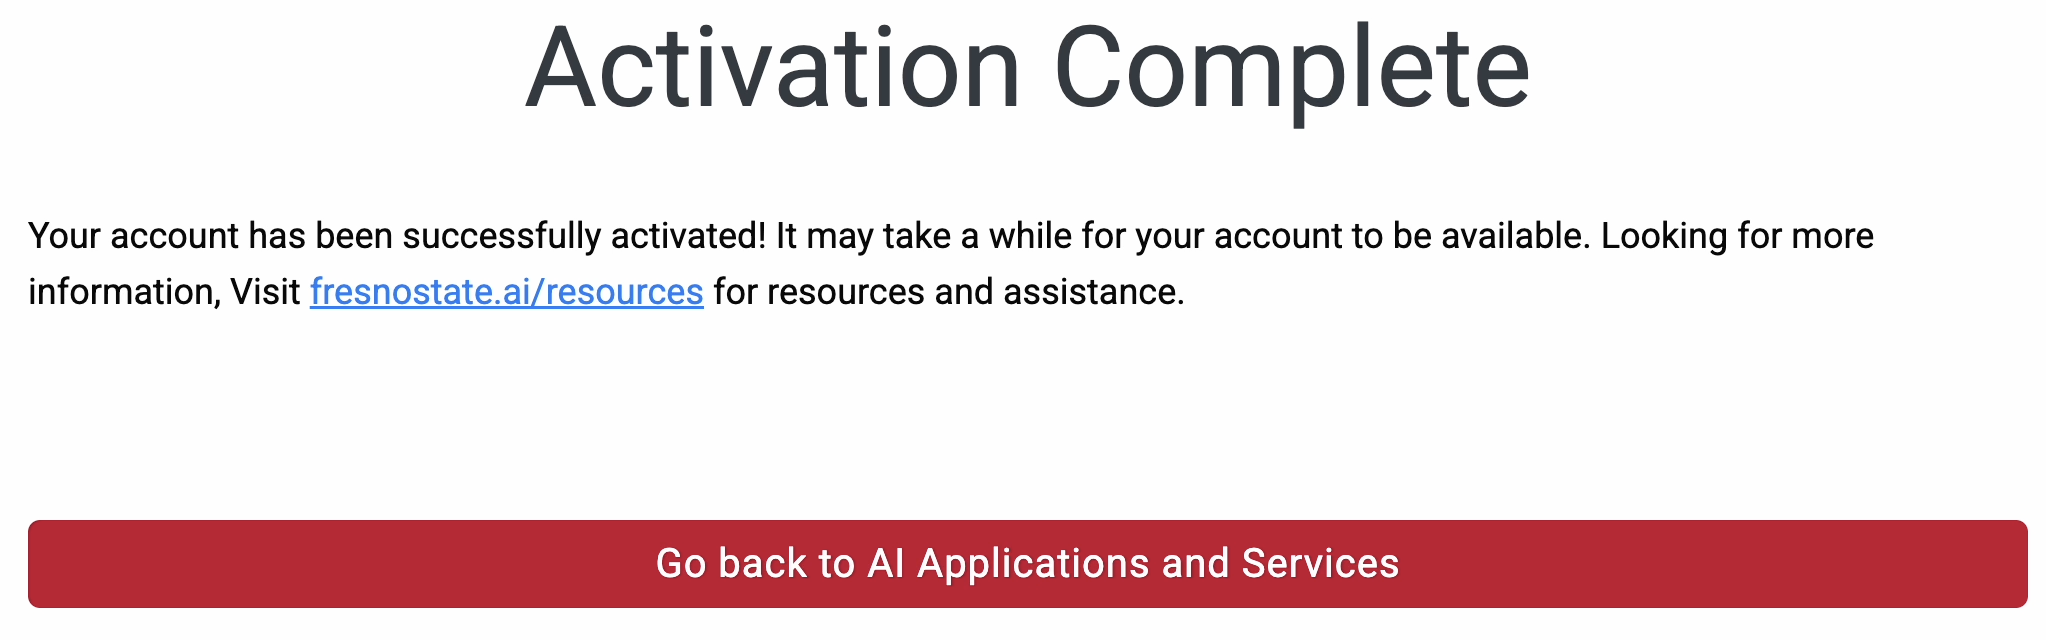
6. Once back on the main page, you’ll now see that the “Activate” button is disabled, which means activation was successful. Click Logout to finish. You will receive an email once your account is available.
7. Once your account is available, you will receive an email notifying you that your account for both tools is ready to use!

What is NotebookLM?
NotebookLM is an AI-powered research and writing tool that helps users organize information, generate insights, and create clear, well-structured content from their sources. Watch the video below to learn more about NotebookLM.
Take a Tour of NotebookLM
In this section, you'll find a video walkthrough designed to guide you through the NotebookLM interface and show you where to find and use key features.
Welcome to NotebookLM! This guide will walk you through the platform step by step so you can get the most out of its features.
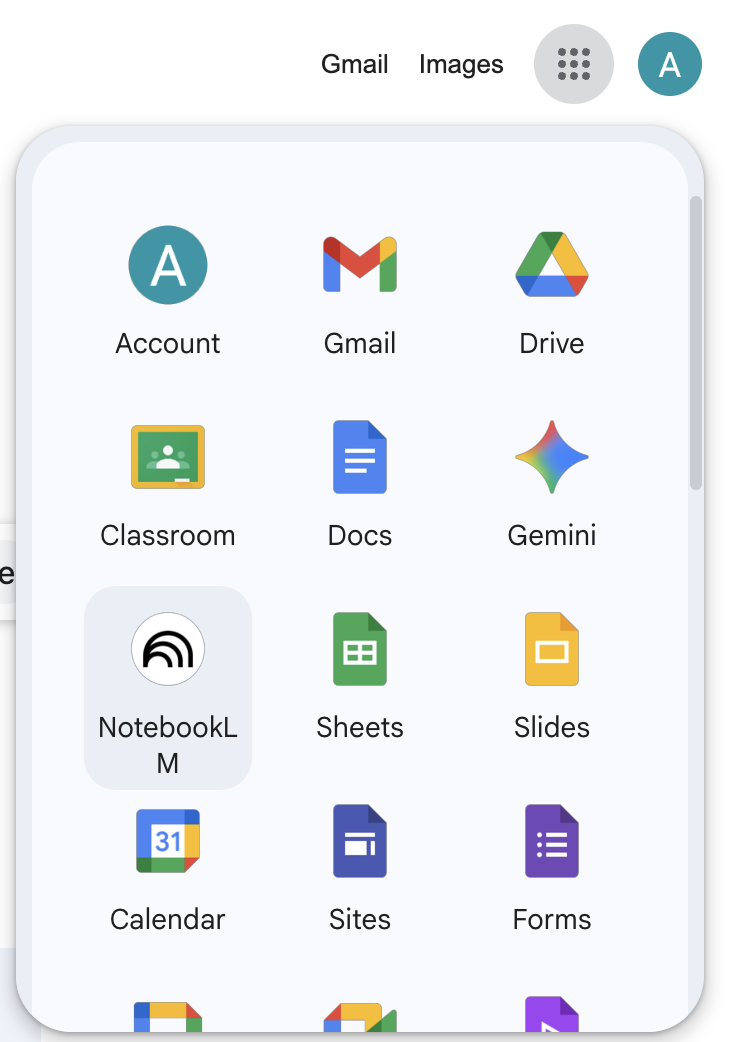
Accessing NotebookLM: You can open NotebookLM directly from the Google Apps Waffle menu in the top-right corner of your browser. Click the grid icon and select NotebookLM to launch it. You can rearrange your app icons by dragging NotebookLM higher in the menu.
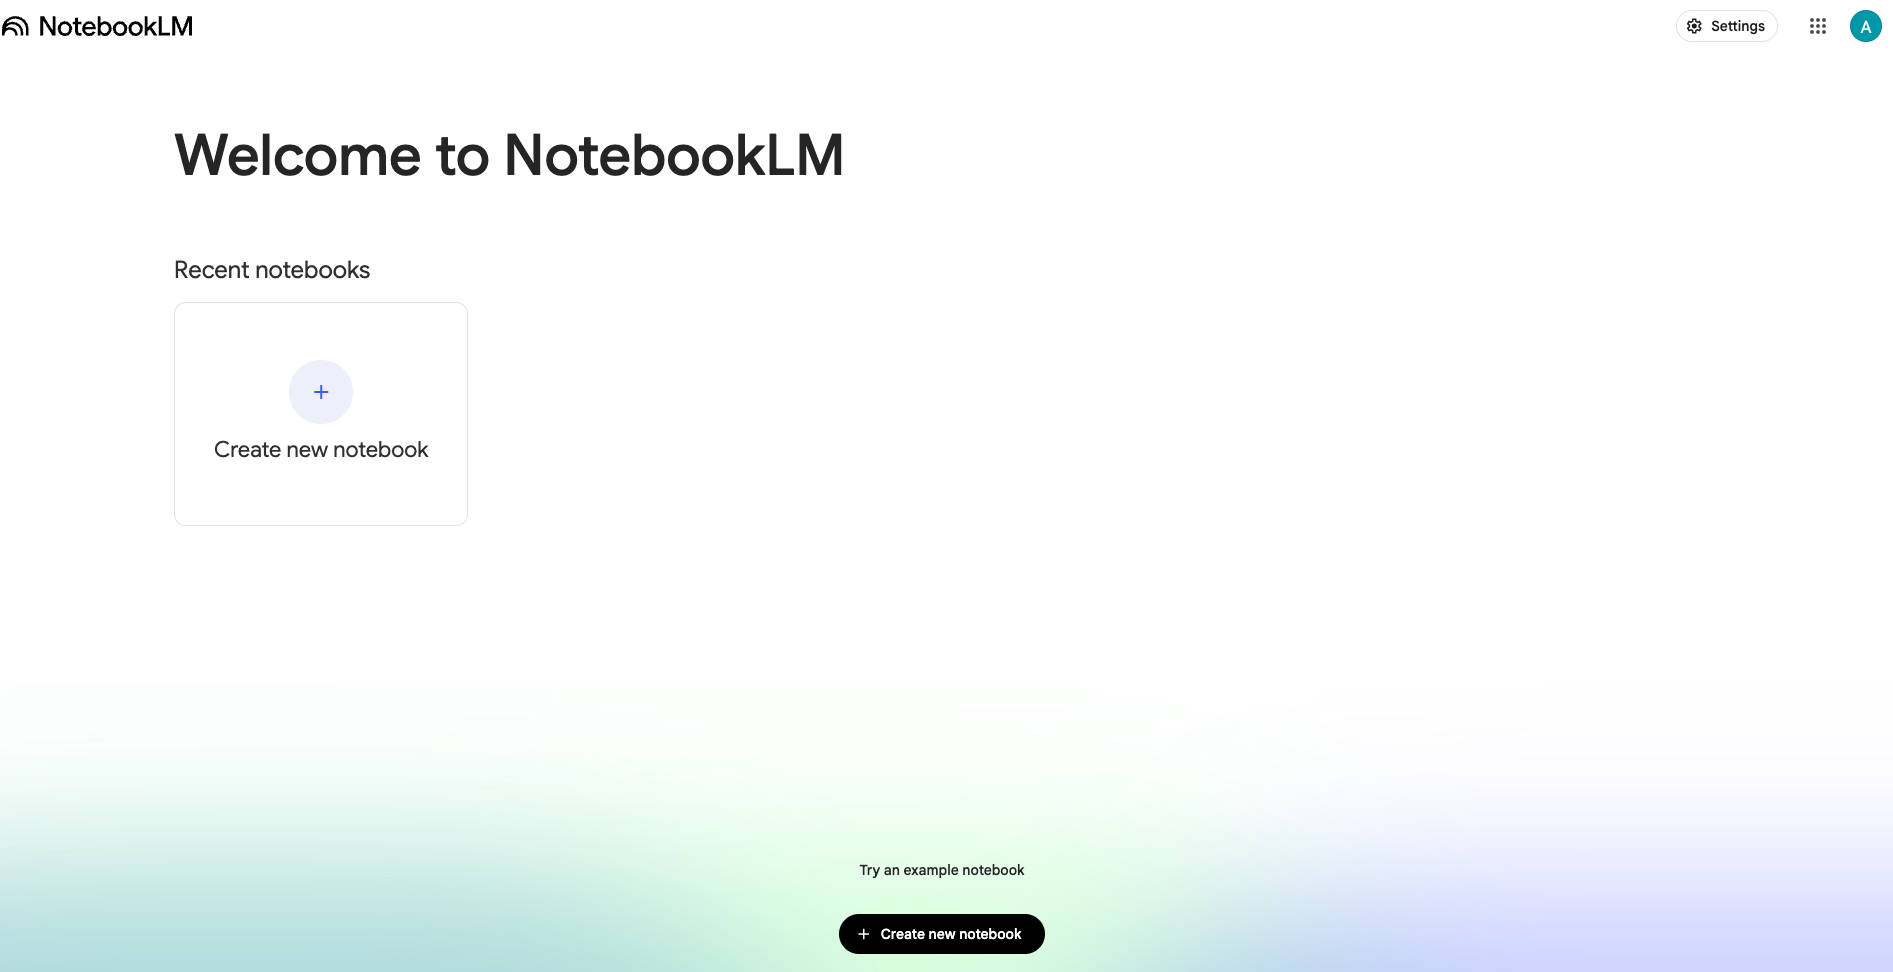
NotebookLM Home: The NotebookLM Home page is your starting point for research and note organization. From here, you can create a new notebook or open a recent one to continue your work. Each notebook acts as a dedicated workspace where you can upload sources, ask questions, and generate summaries or insights based on your materials.
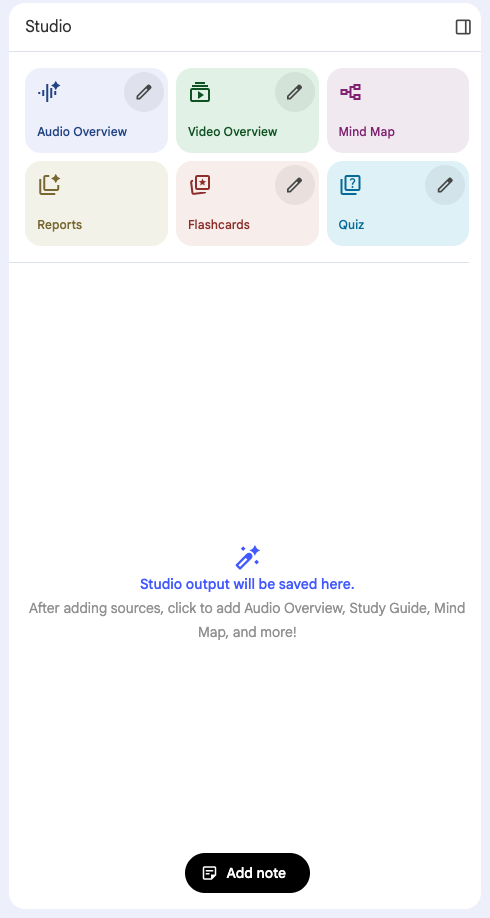
Create a Notebook: When you create a new notebook, you’ll see three main sections: Sources, Chat, and Studio. You can upload or add sources such as PDFs, Google Docs, or website links. Once added, you can use the Chat panel to ask questions, summarize content, or generate insights from your materials. The Studio section lets you transform your research into different formats, such as Audio or Video Overviews, Mind Maps, Reports, Flashcards, or Quizzes for deeper understanding and engagement.
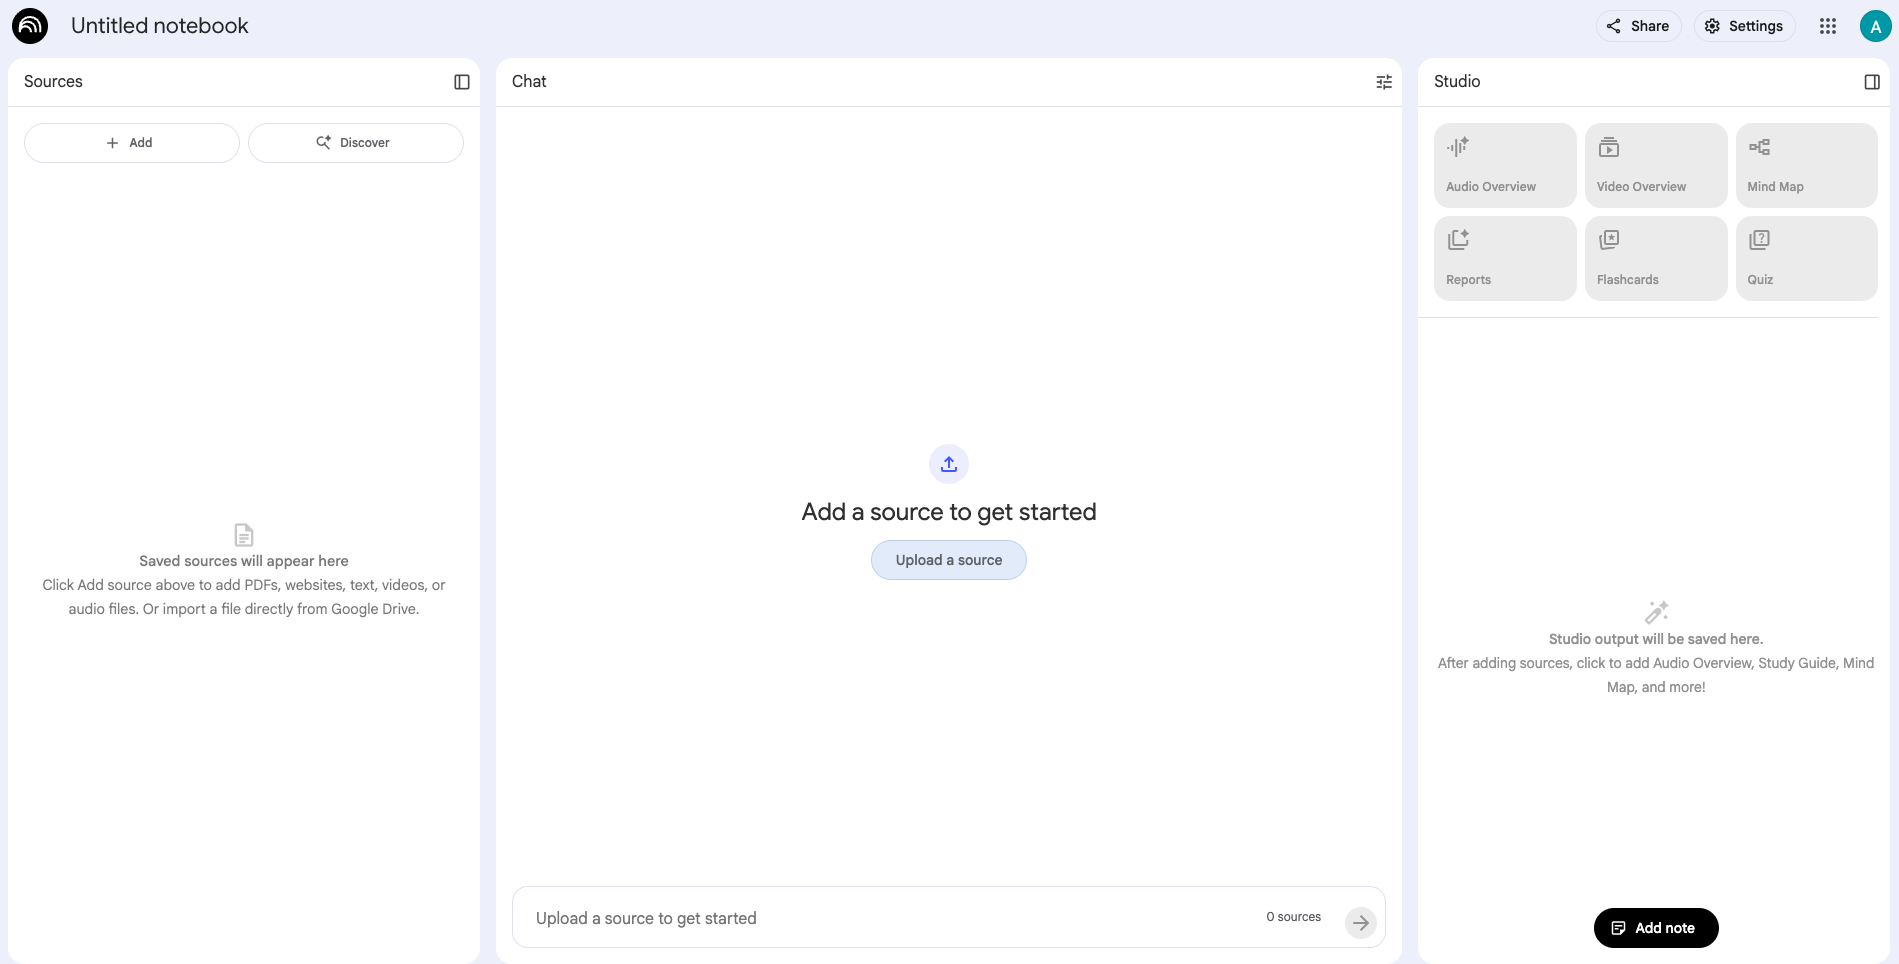
Add Sources: The Add Sources page lets you upload materials that NotebookLM will use to generate summaries and insights. You can import PDFs, text files, audio, or Google Drive documents, or link to websites and YouTube videos.
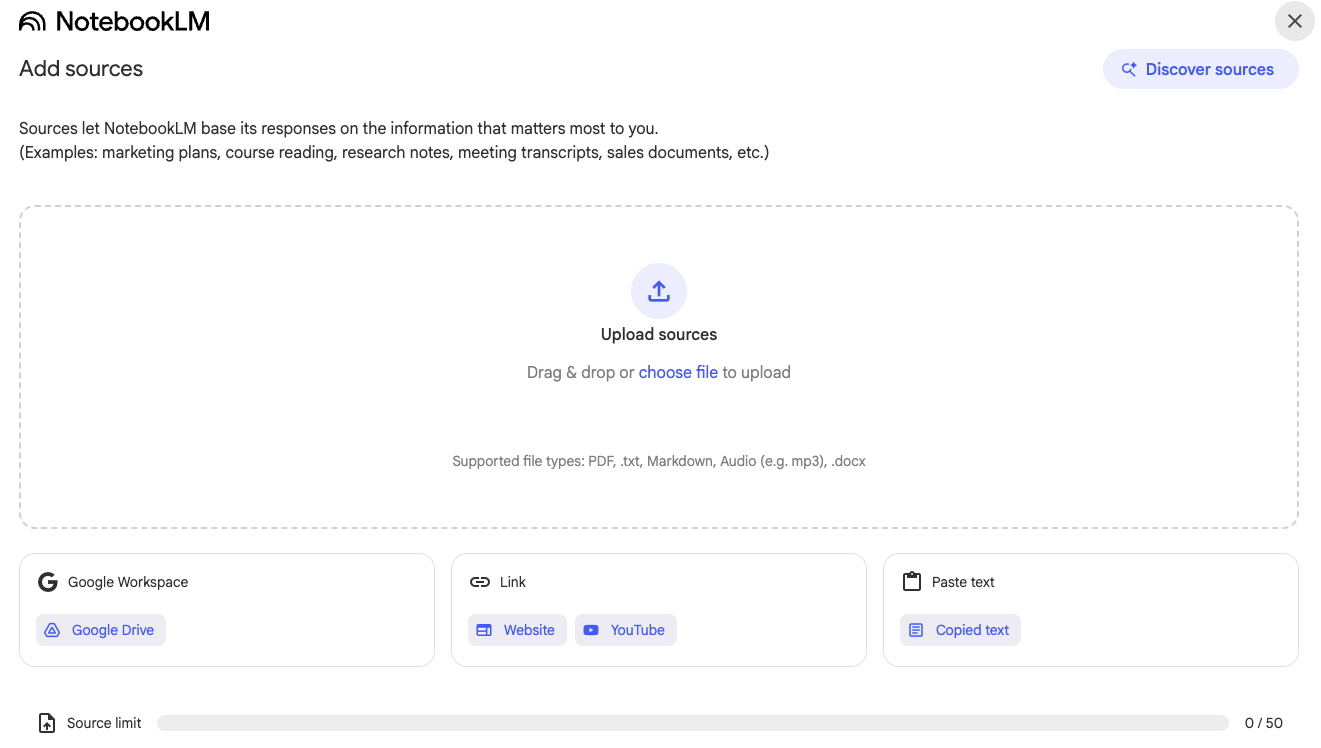
Discover Sources: The Discover Sources feature helps you find new materials to add to your notebook. You can search for topics directly on the web or within your Google Drive, or click “I’m feeling curious” to explore suggested subjects.

Chat: The Chat section is where you interact with your uploaded sources. You can ask questions, summarize content, or explore connections within your materials.

Studio: The Studio section helps you turn your research into useful learning materials. After adding sources, you can create Audio or Video Overviews, Mind Maps, Reports, Flashcards, and Quizzes. These tools make it easy to summarize, visualize, and reinforce what you’ve learned from your notebook content.
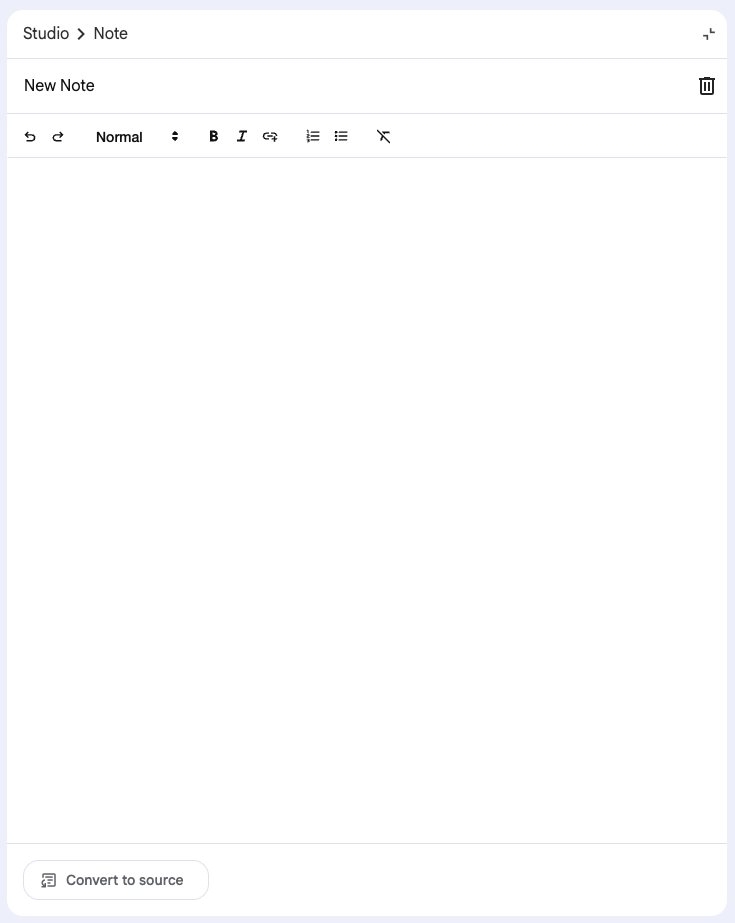
Note: Within the Studio workspace, the Note editor allows you to create and organize your own written content. You can format text, jot down insights, or summarize ideas based on your sources. Notes can also be converted into new sources, letting you build and expand your research directly within NotebookLM.
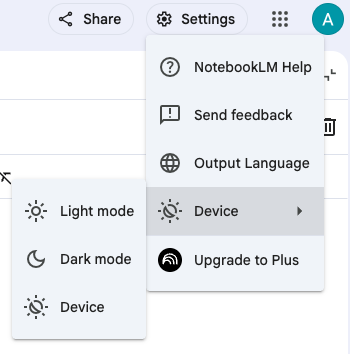
Settings: The Settings menu gives you quick access to key options like NotebookLM Help, Send feedback, and Output Language. You can also adjust your Device theme or upgrade to NotebookLM Plus for enhanced features.
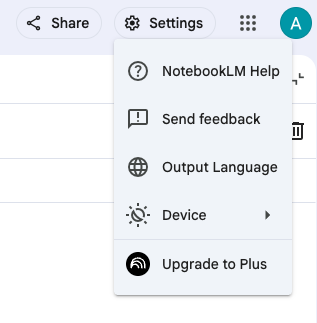
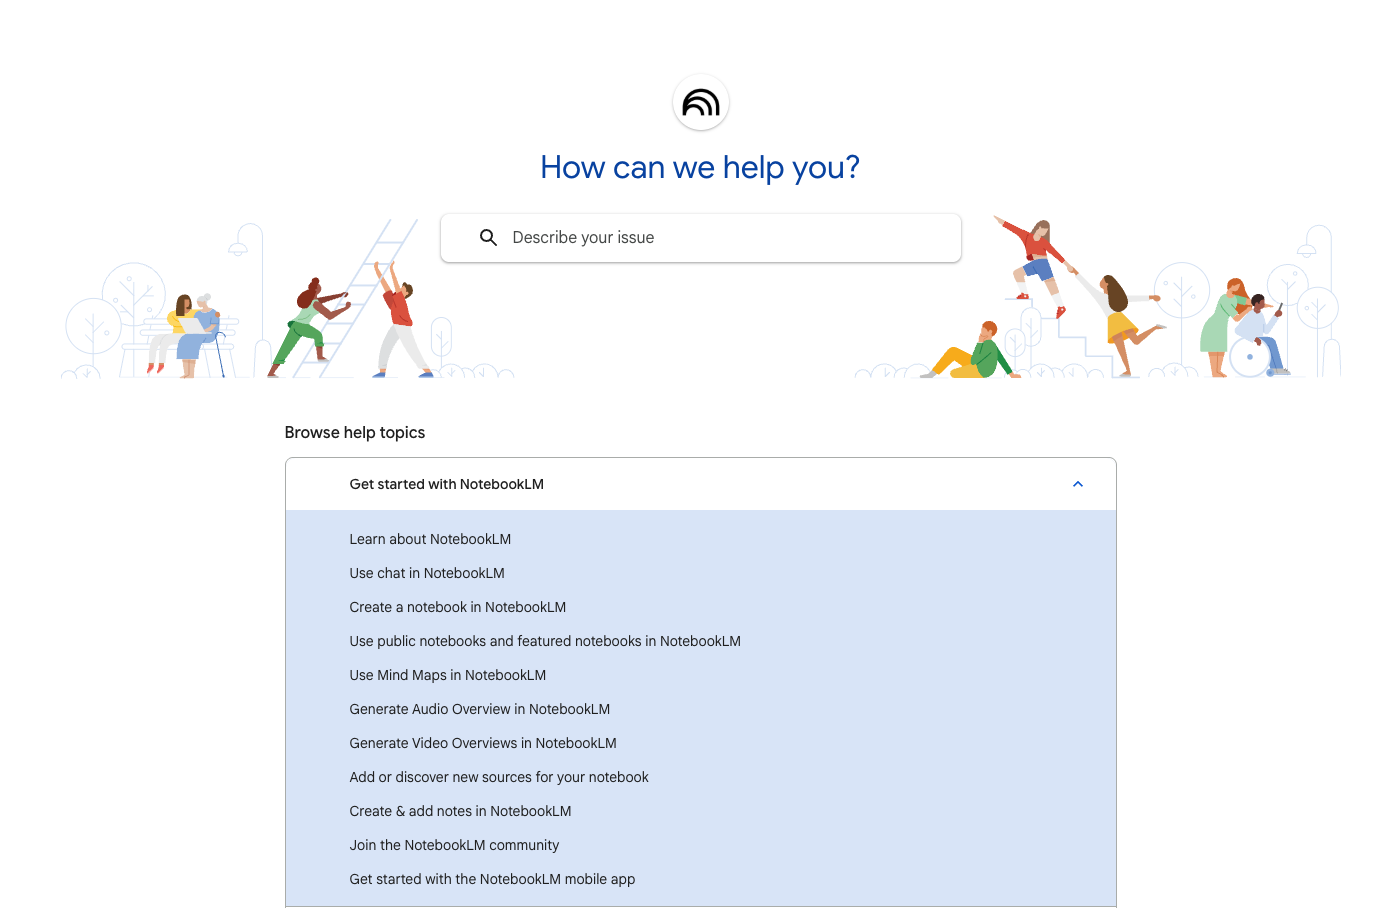
NotebookLM Help: The Help center provides quick access to answers and tutorials for using NotebookLM. You can search for specific topics, explore how-to guides, or browse sections like Getting Started, Chat, Mind Maps, and more.
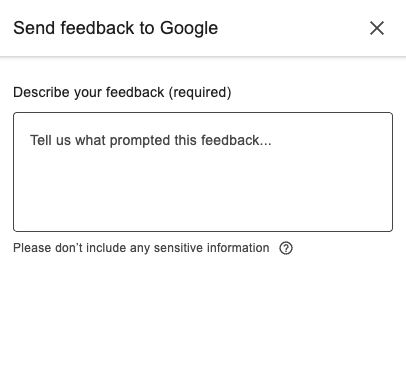
Send Feedback: The Send Feedback option allows you to share your thoughts or report issues directly to Google.
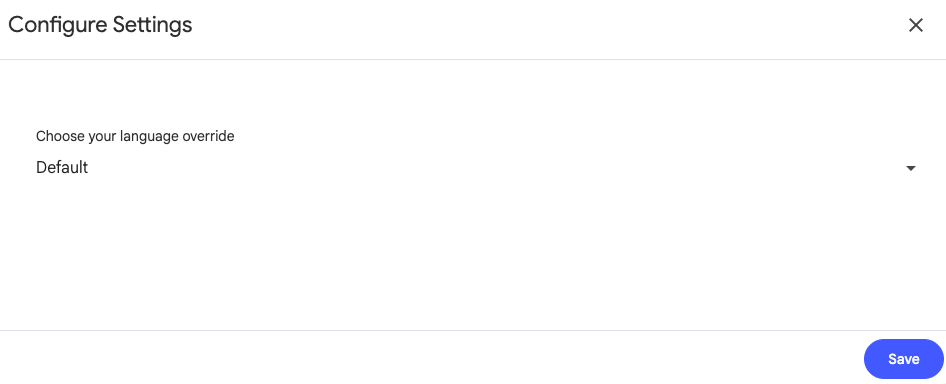
Output Language: The Output Language setting lets you choose the language used in NotebookLM’s responses. You can keep it on Default or select another language.
Device Appearance: The Device option lets you switch between Light Mode, Dark Mode, or follow your system’s default theme.