ChatGPT Edu for Fresno State
ChatGPT Plugins
ChatGPT plugins allow ChatGPT to securely connect with other applications and services to help you access information and complete tasks as part of your conversations. Fresno State has enabled a select set of plugins for campus-supported applications making them available for you to use with ChatGPT.
Plugins are optional and require your permission. Enabling a plugin at the campus level does not automatically give ChatGPT access to your individual account or information. You choose whether to connect an available plugin and will be asked to review and grant the appropriate permissions before it can access your account. If you do not connect a plugin, ChatGPT will not have access to your account through that plugin.
Available Plugins
A select set of plugins have been made available within Fresno State’s ChatGPT Edu environment. Each plugin connects ChatGPT with a campus-supported application to provide additional capabilities and help you work with information from the services you already use.
Review each plugin to learn what it can do here.
How to Grant a Plugin Authorization
Plugin authorization is not granted automatically. While Fresno State has made supported plugins available within ChatGPT, you decide which plugins you want to connect and authorize. Access is granted only after you complete the authorization process. If you choose not to connect a plugin, ChatGPT will not have access to your account through that plugin.
There are three ways to authorize a plugin. You can connect it directly from the Plugins menu, in your ChatGPT settings, or ChatGPT may prompt you to connect and authorize a plugin when you try to use it during a conversation. In either case, access is granted only after you complete the authorization process.
Step 1. Click on "Plugins" located in the sidebar.
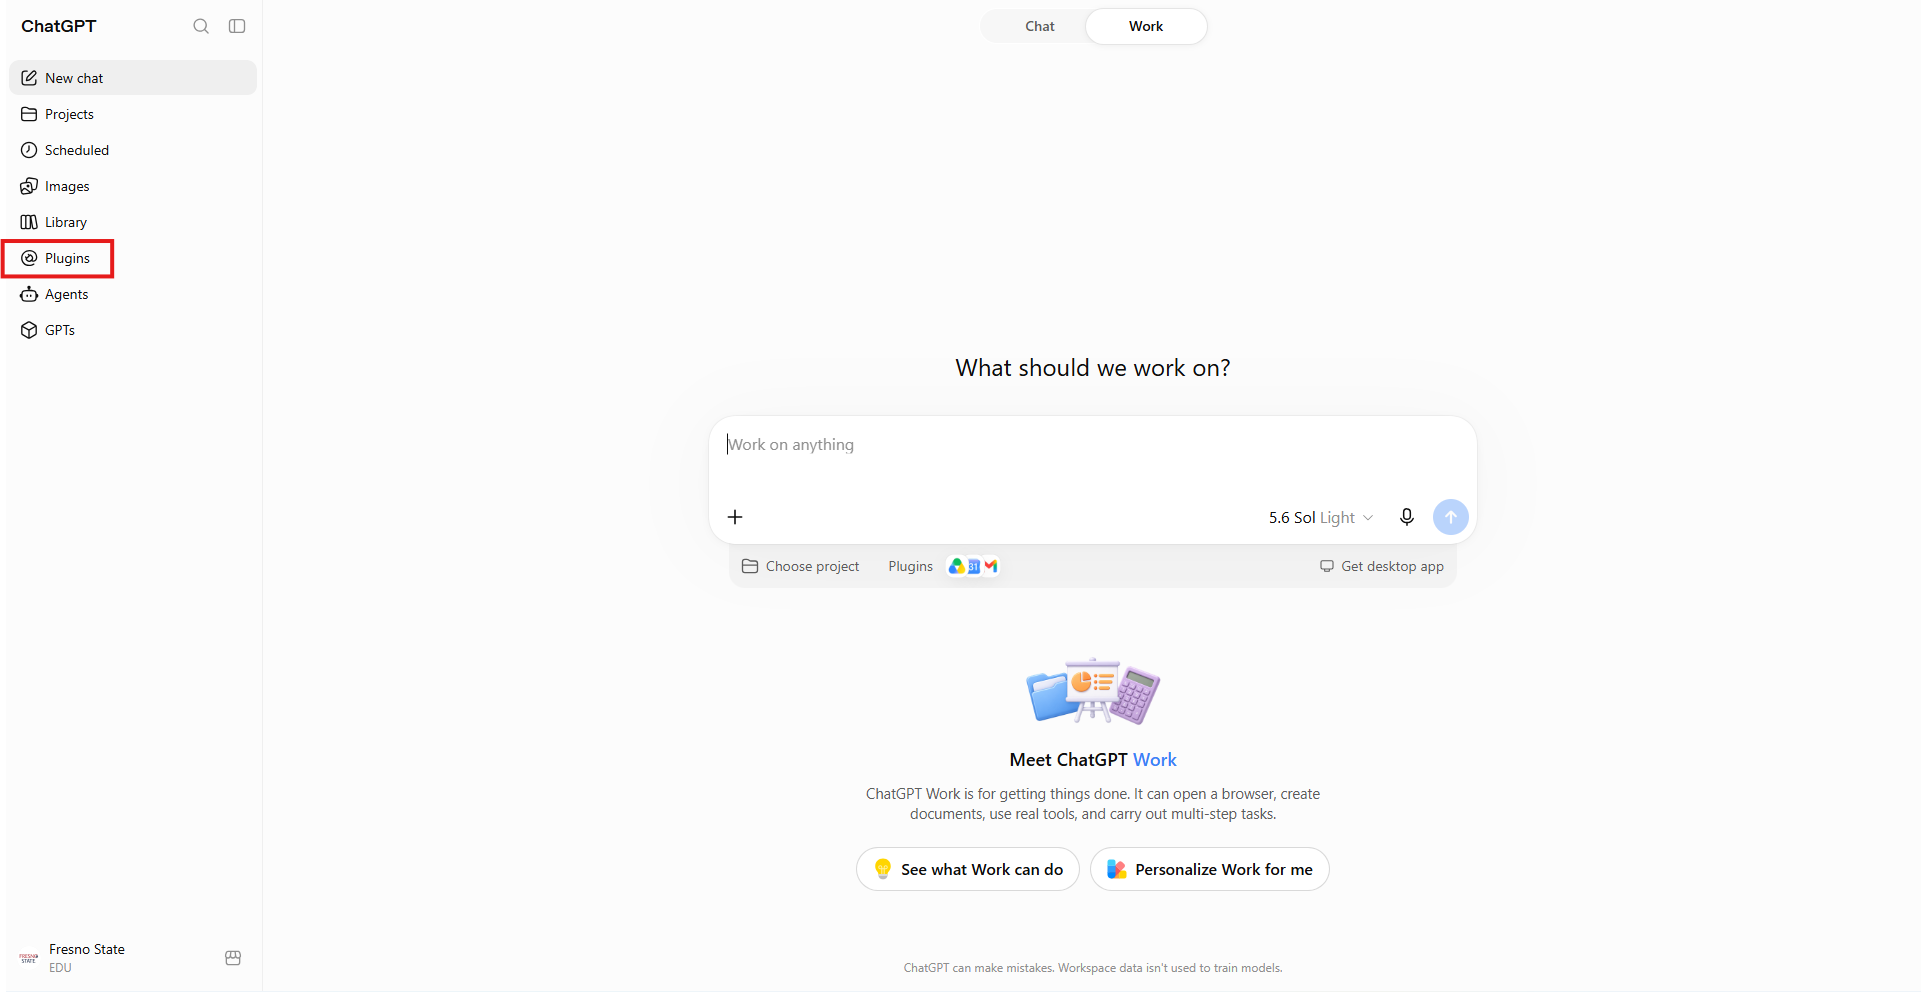
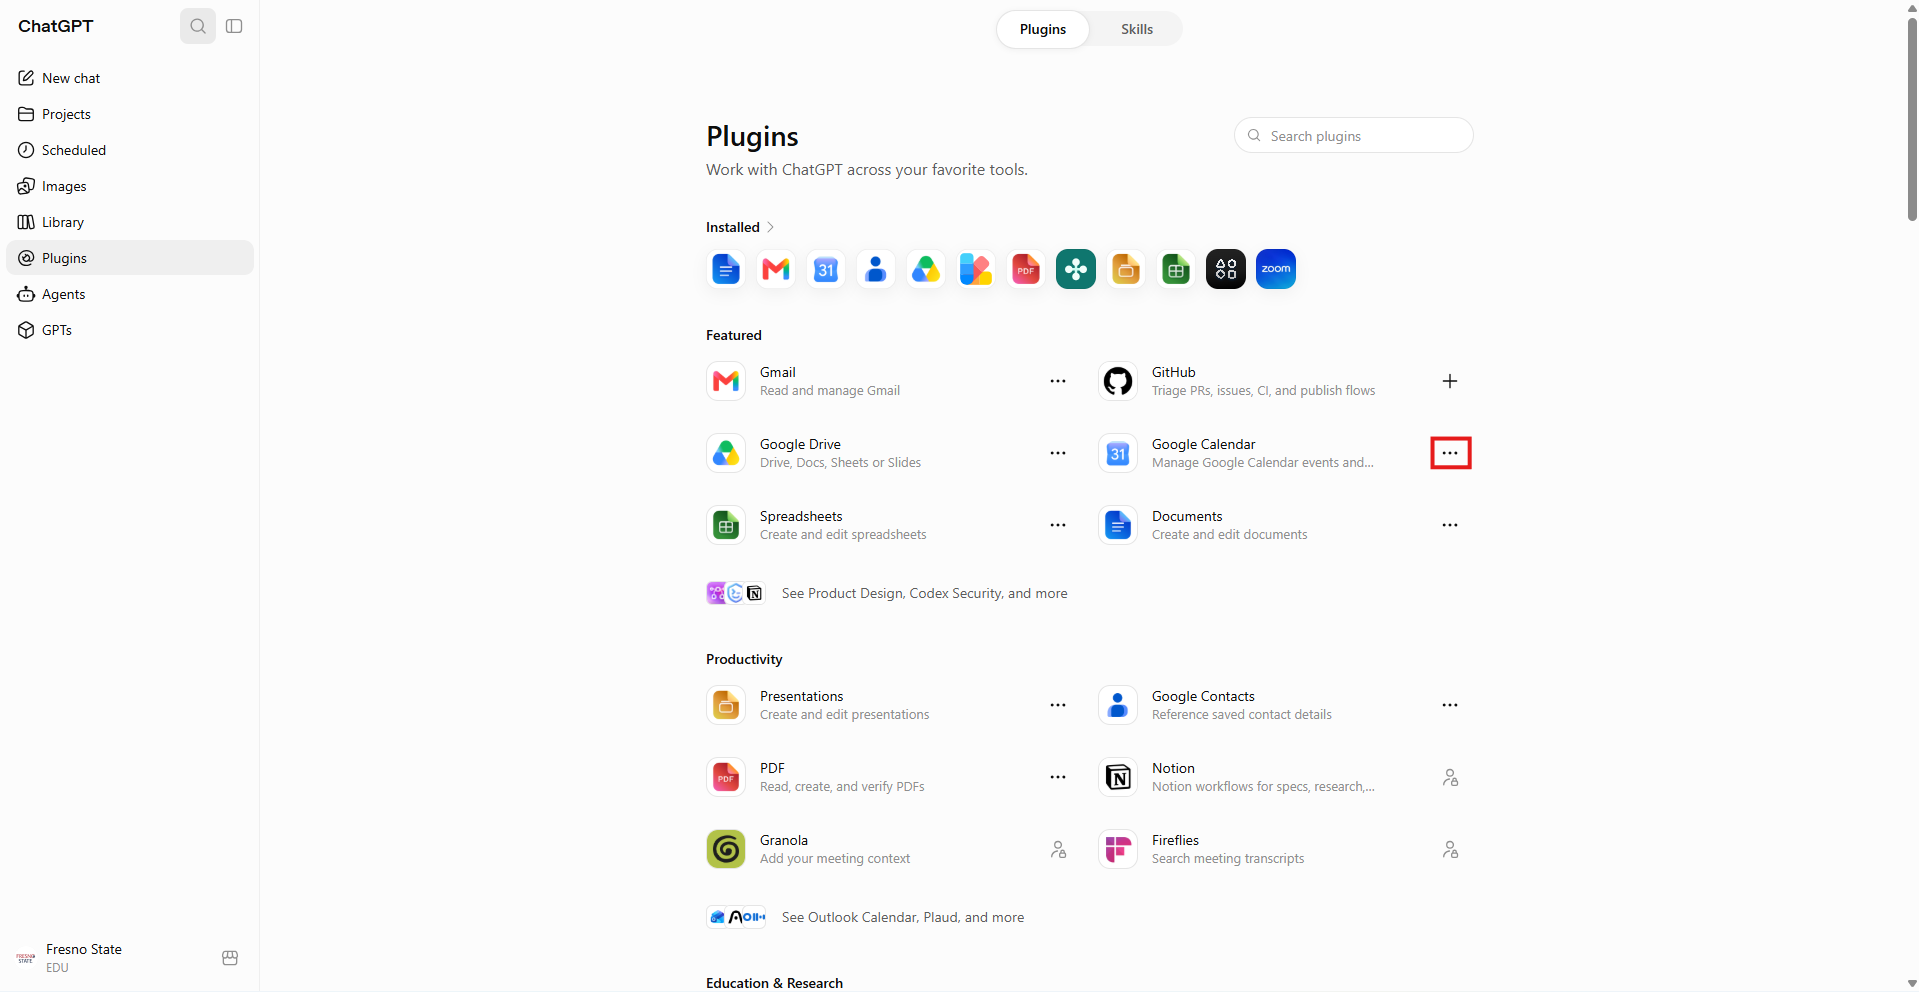
Step 2. Click on the Plugin you want to enable. Please note that only a select set of plugins have been made available.
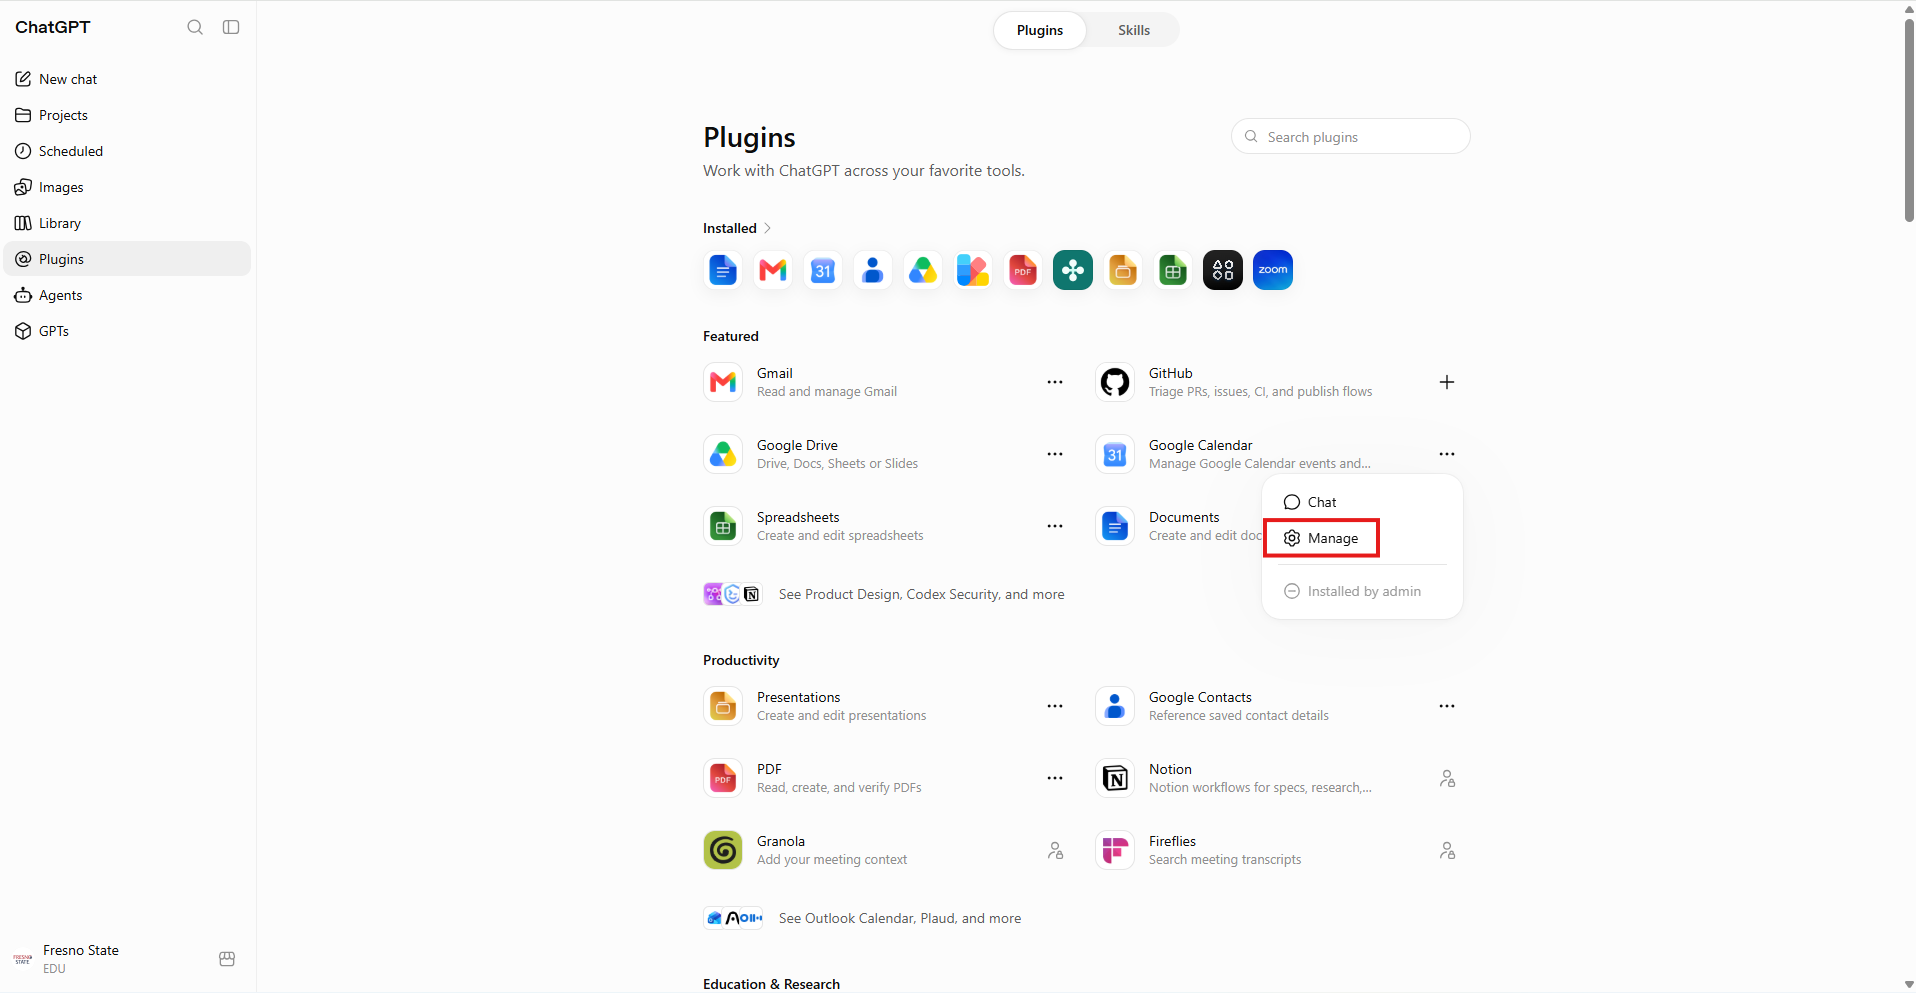
Step 3. Click on "Manage" in the popup that appears.
Step 4. Click on "Connect" to begin the authorization process.
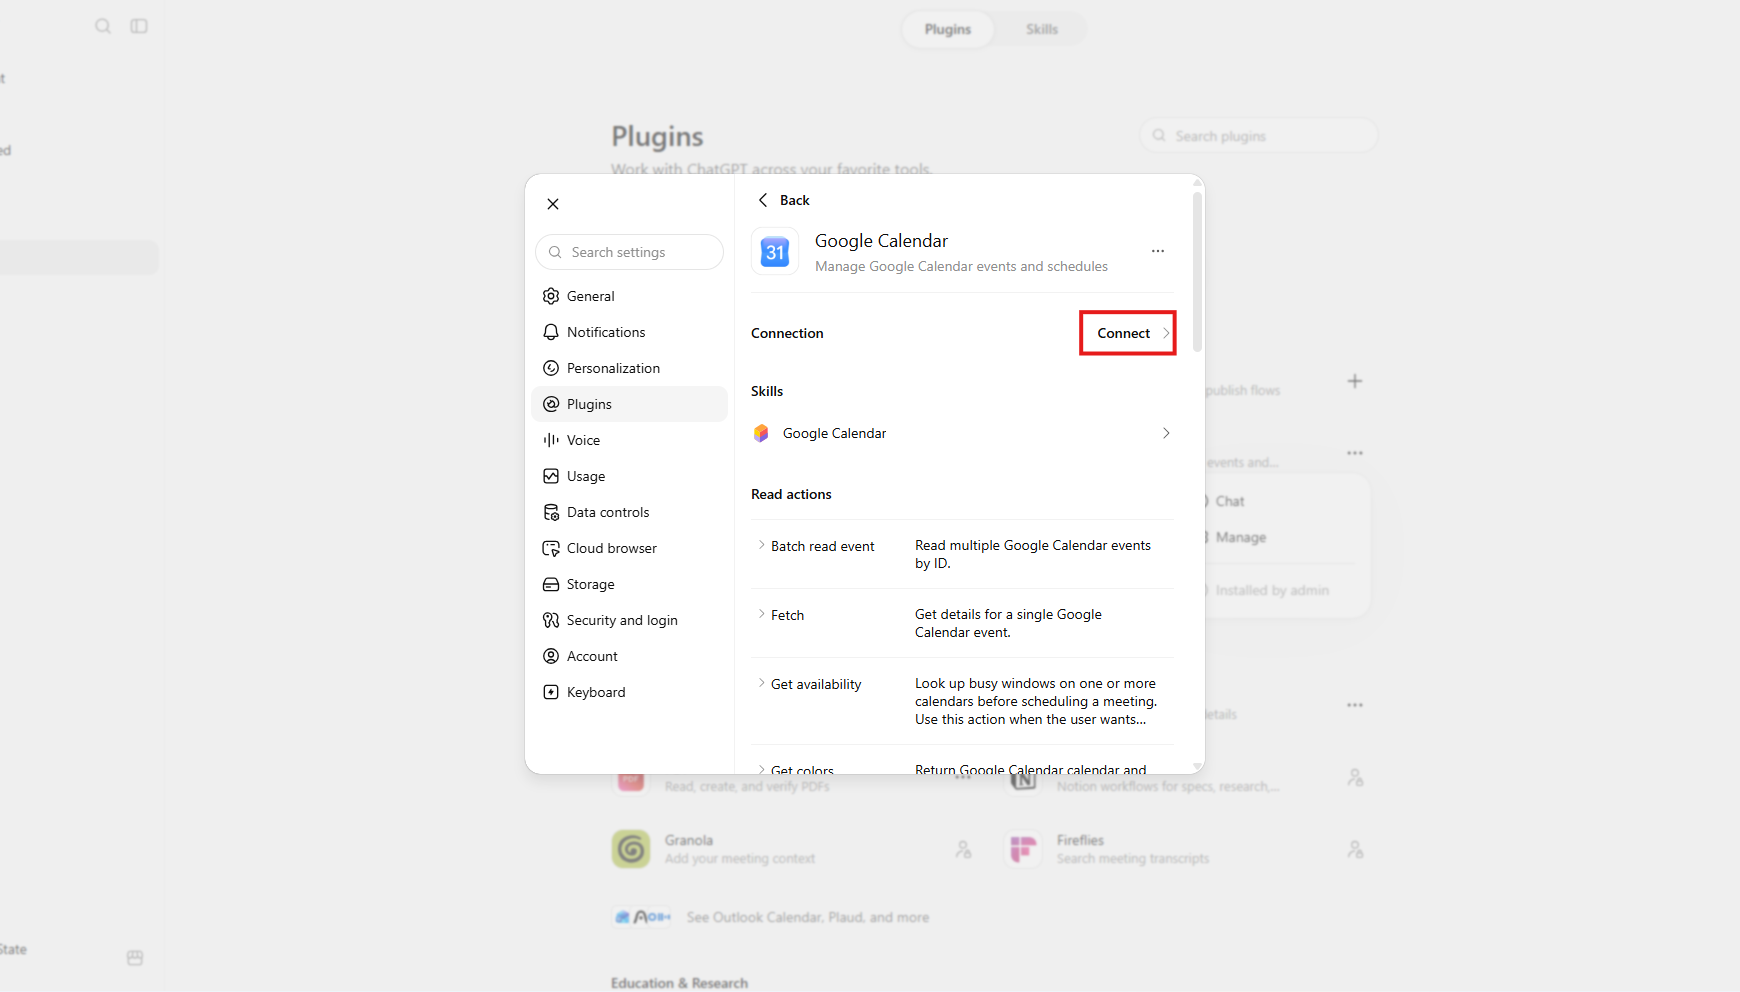
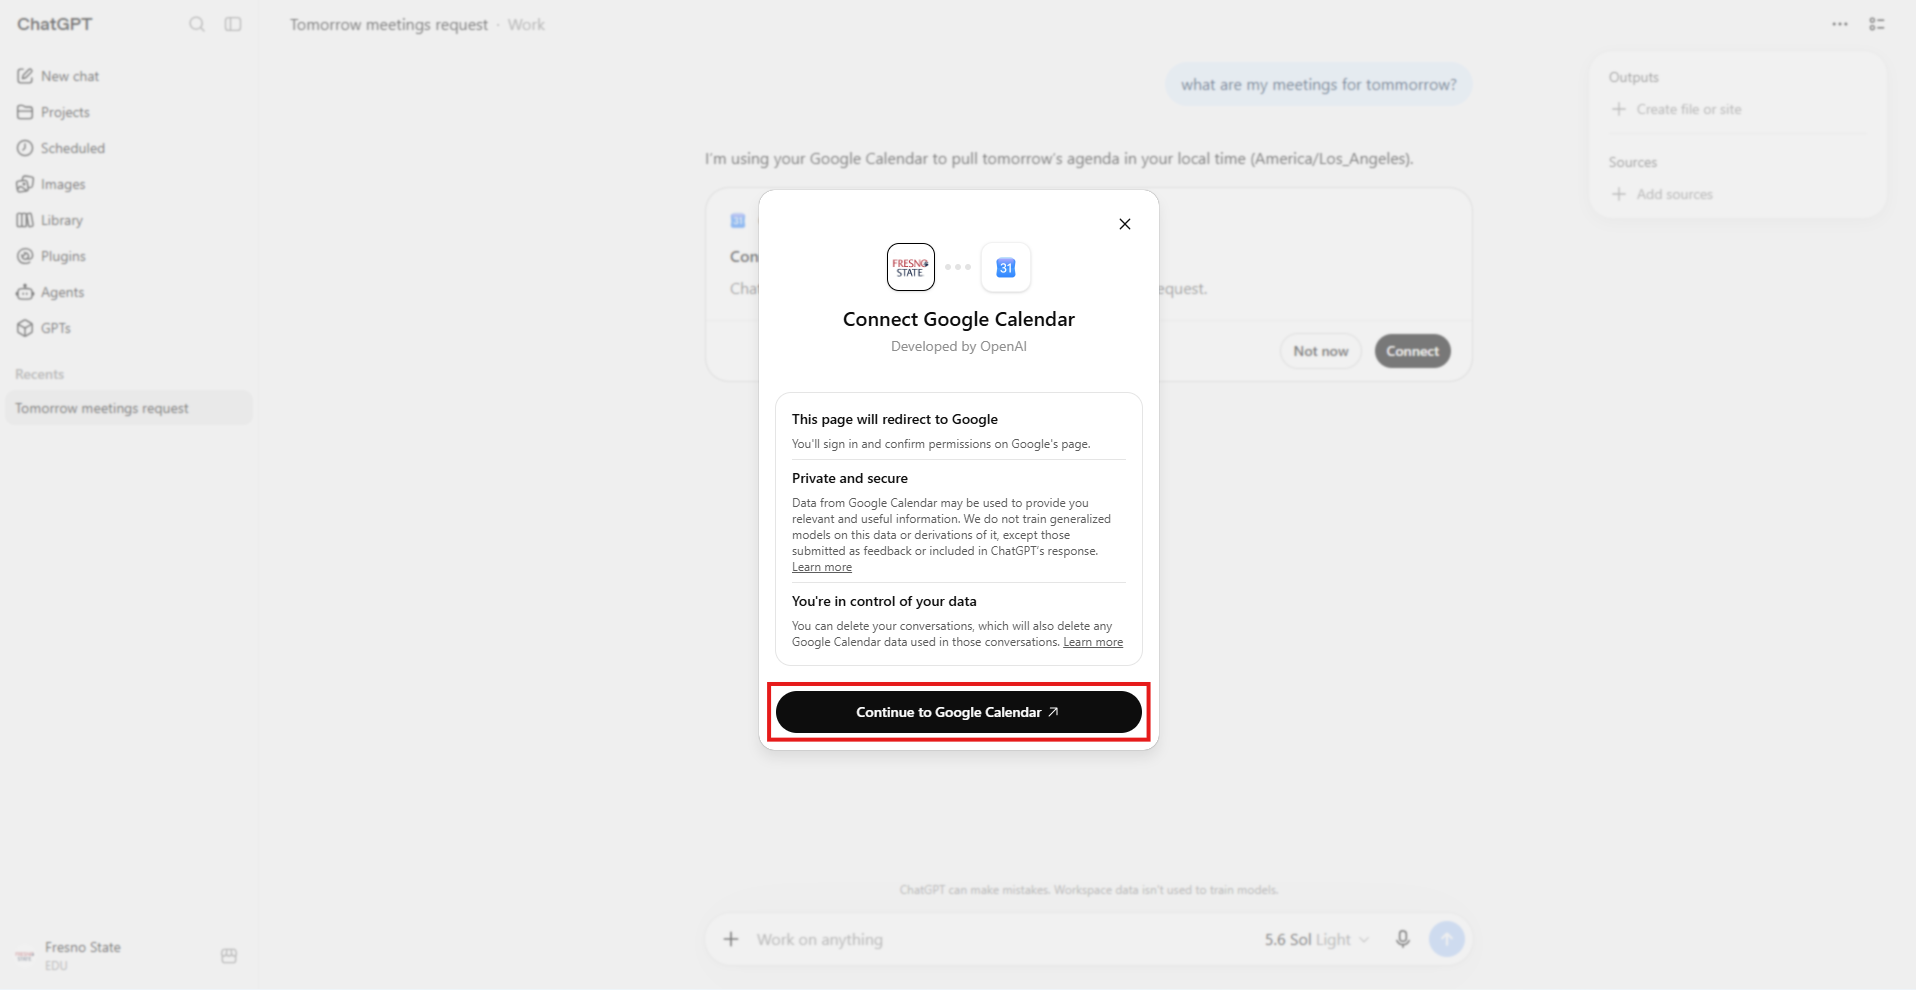
Step 5. Click "Continue..." to be redirected to source application, where you can provide your authorization.
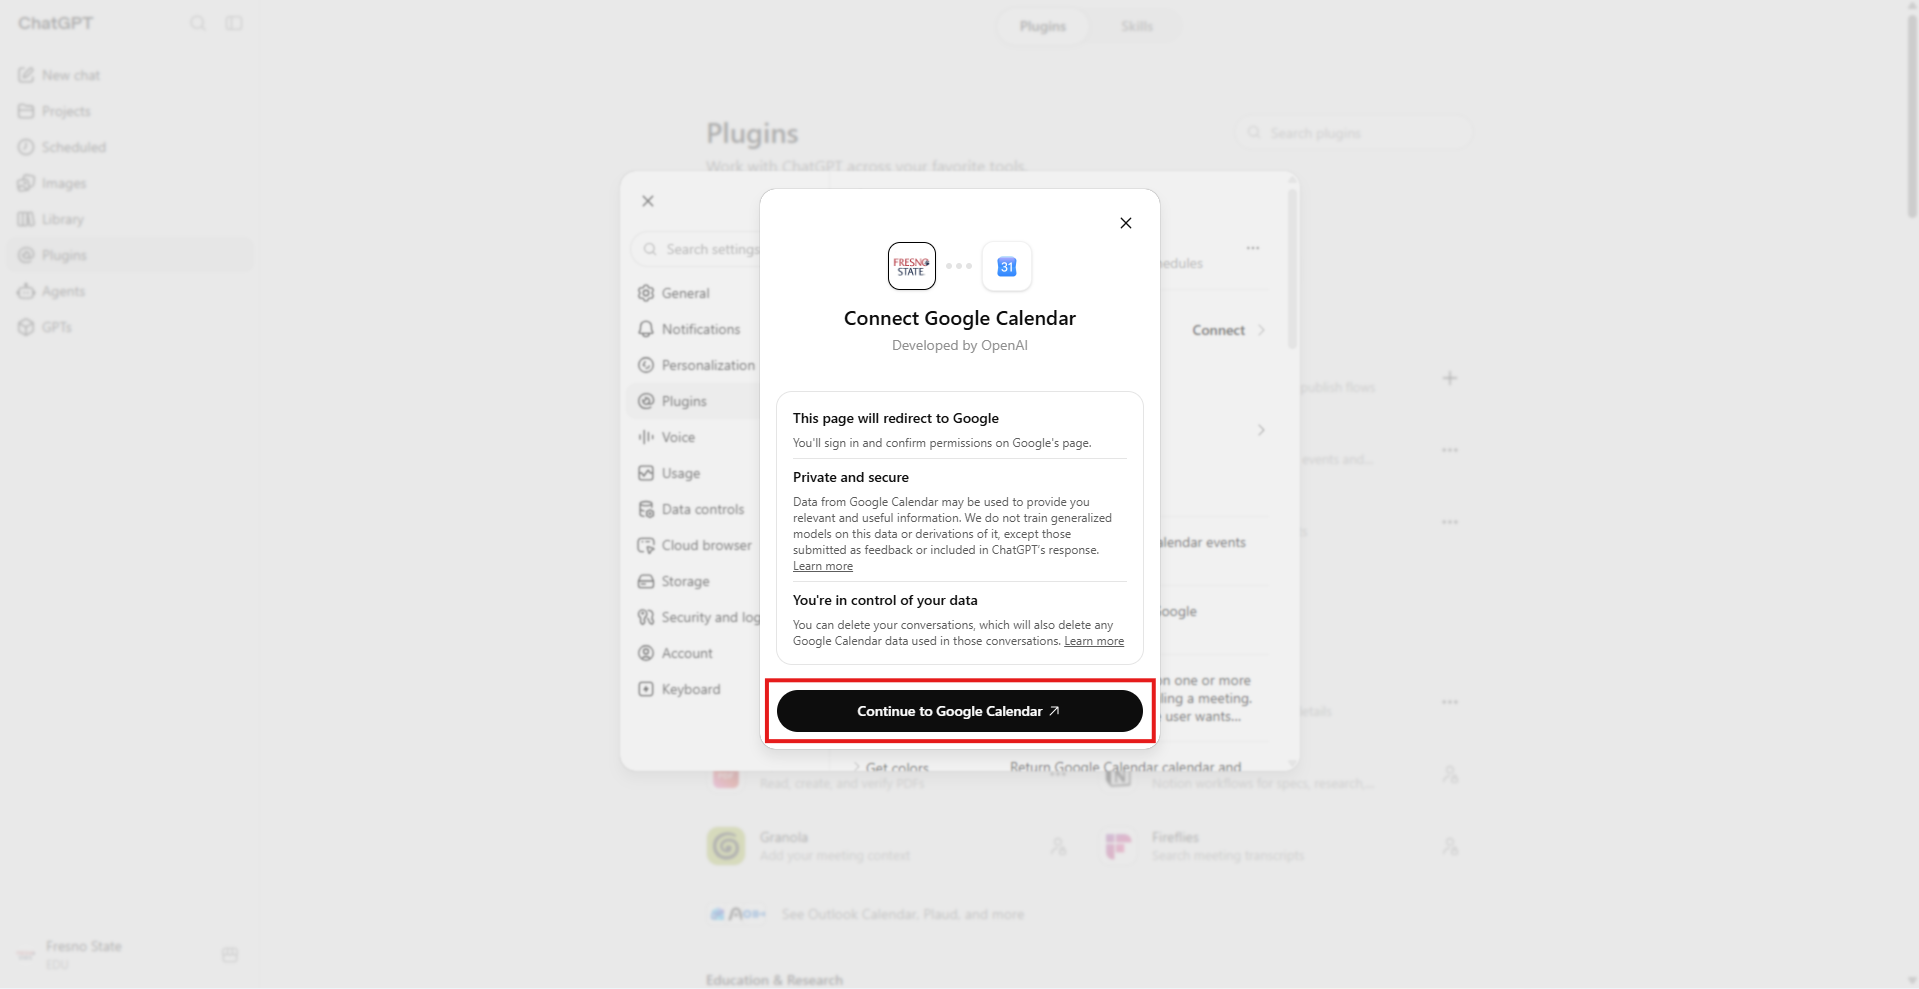
Step 1. Click on your profile icon located in the sidebar.
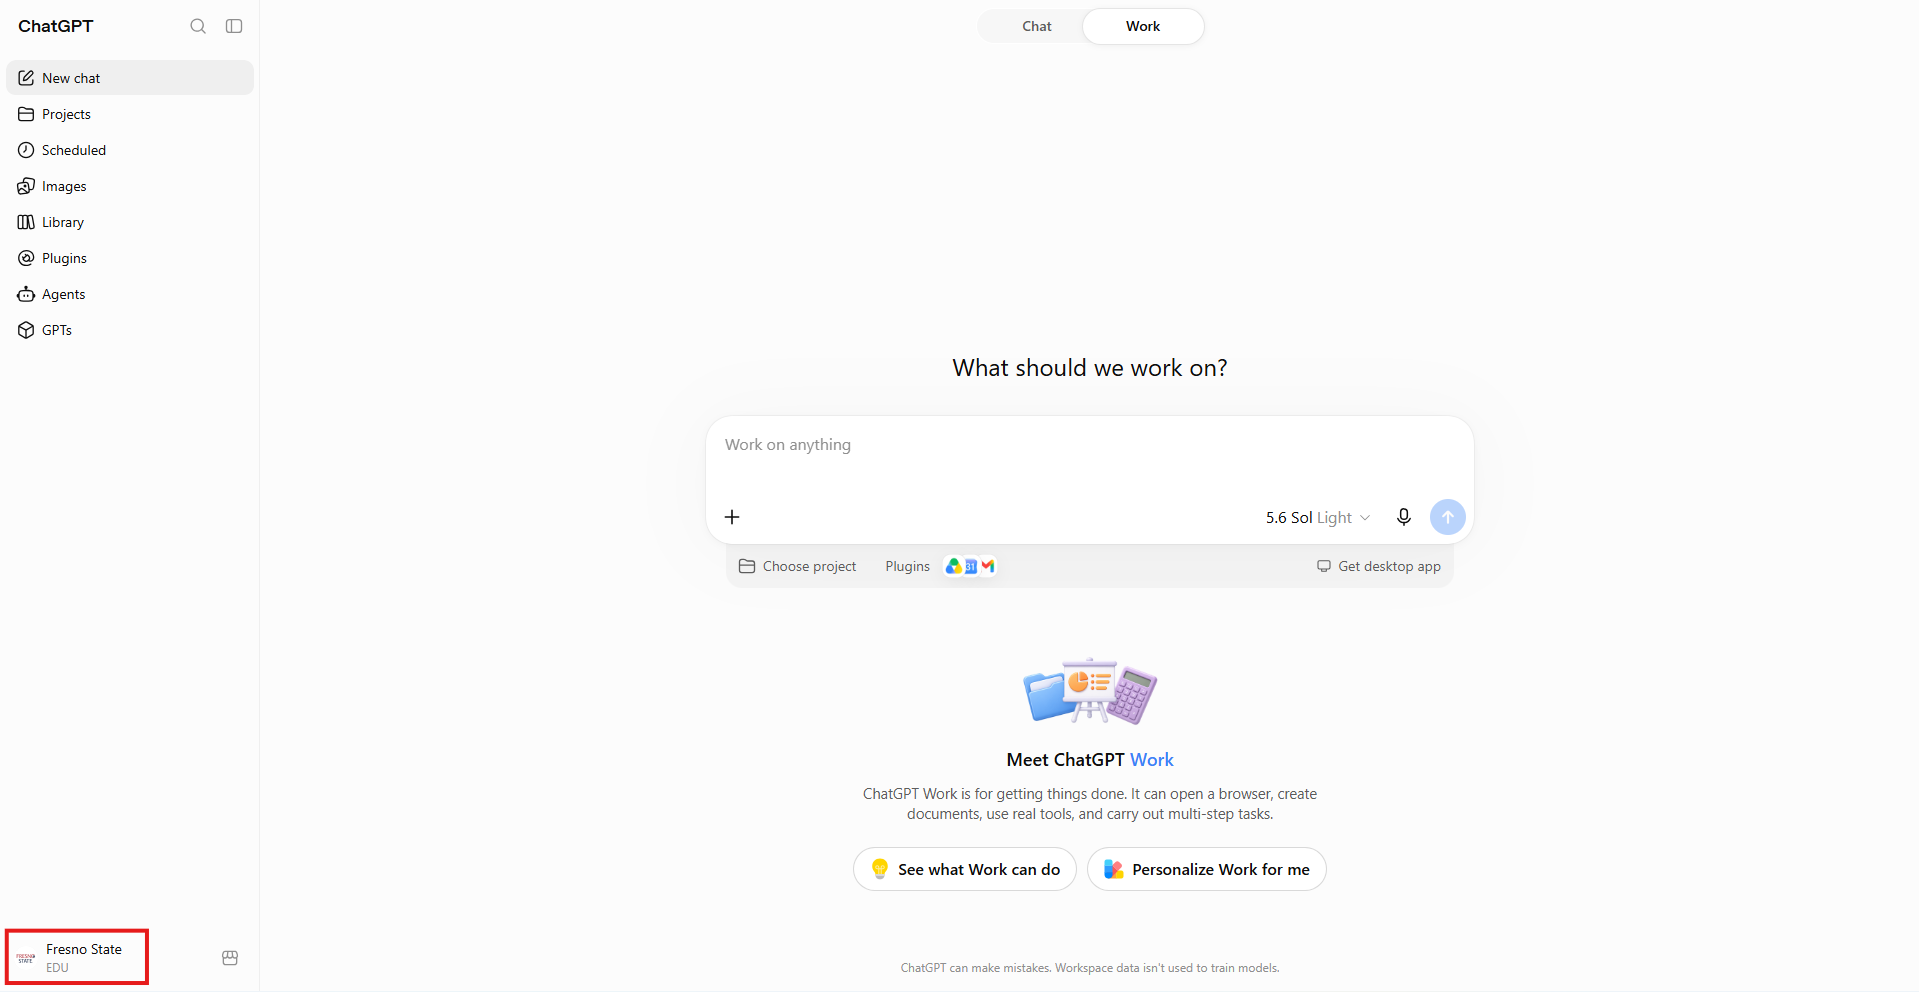
Step 2. In the options menu that appears, click on "Settings".
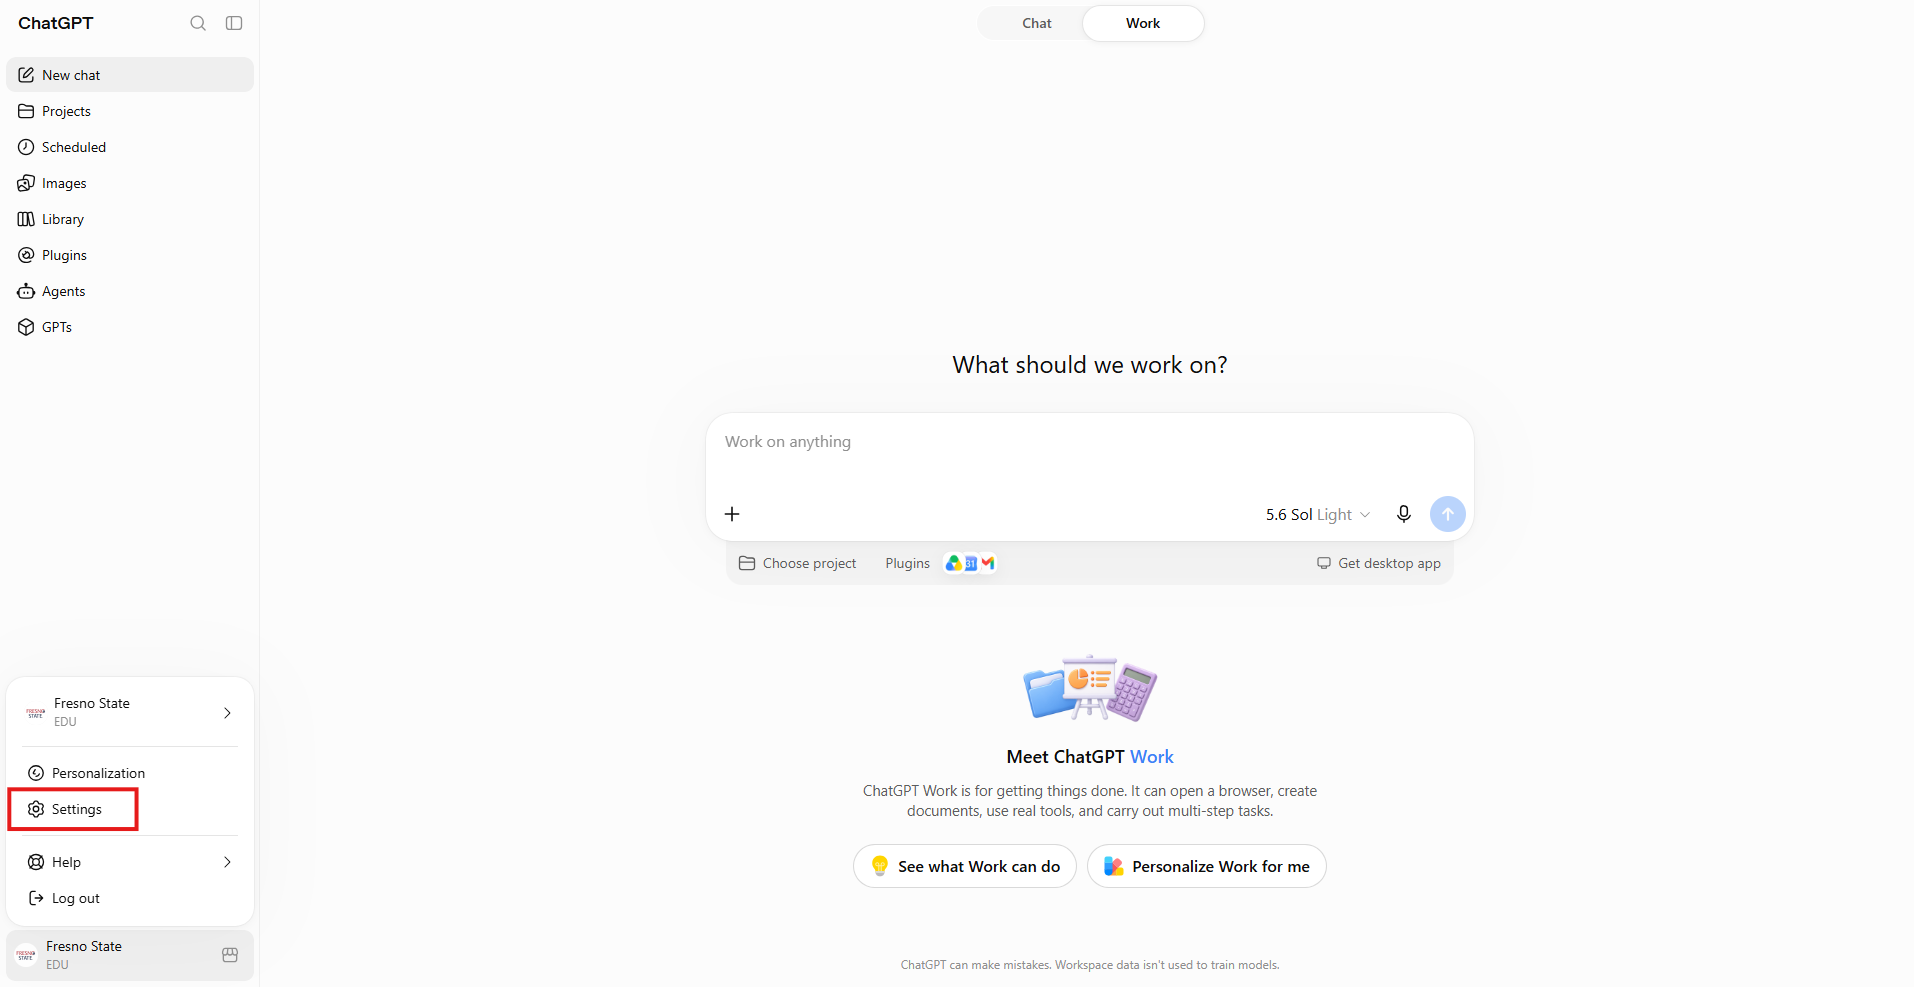
Step 3. Click on "Plugins".
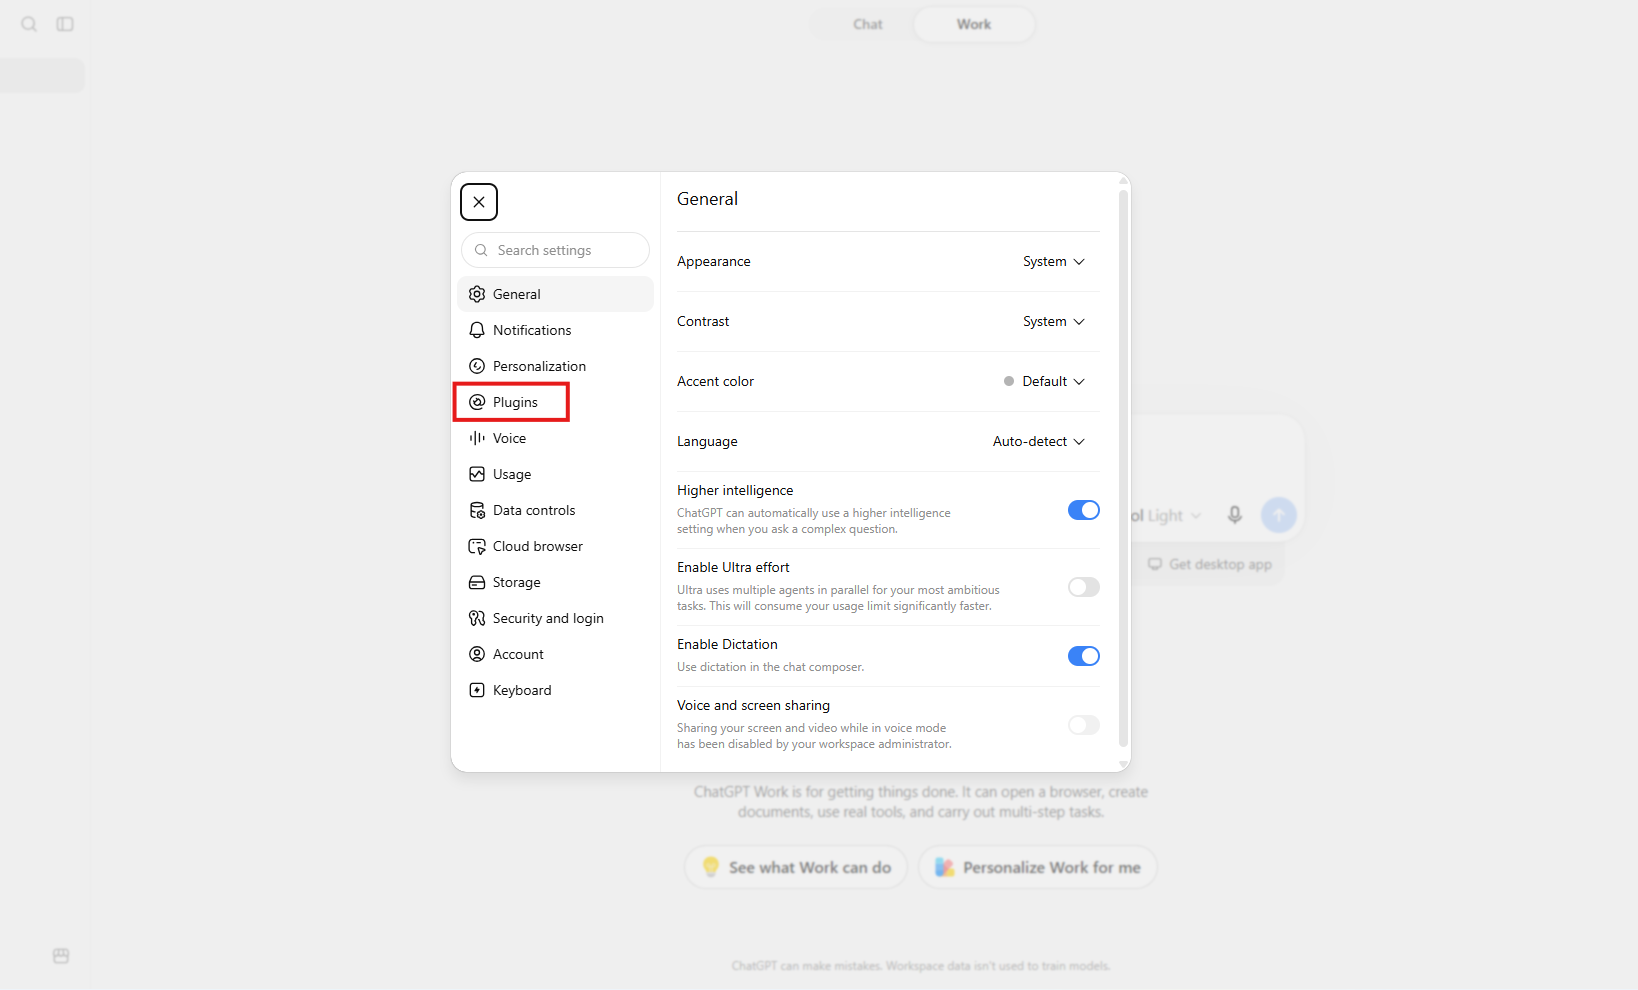
Step 4. Select the plugin you want to enable.
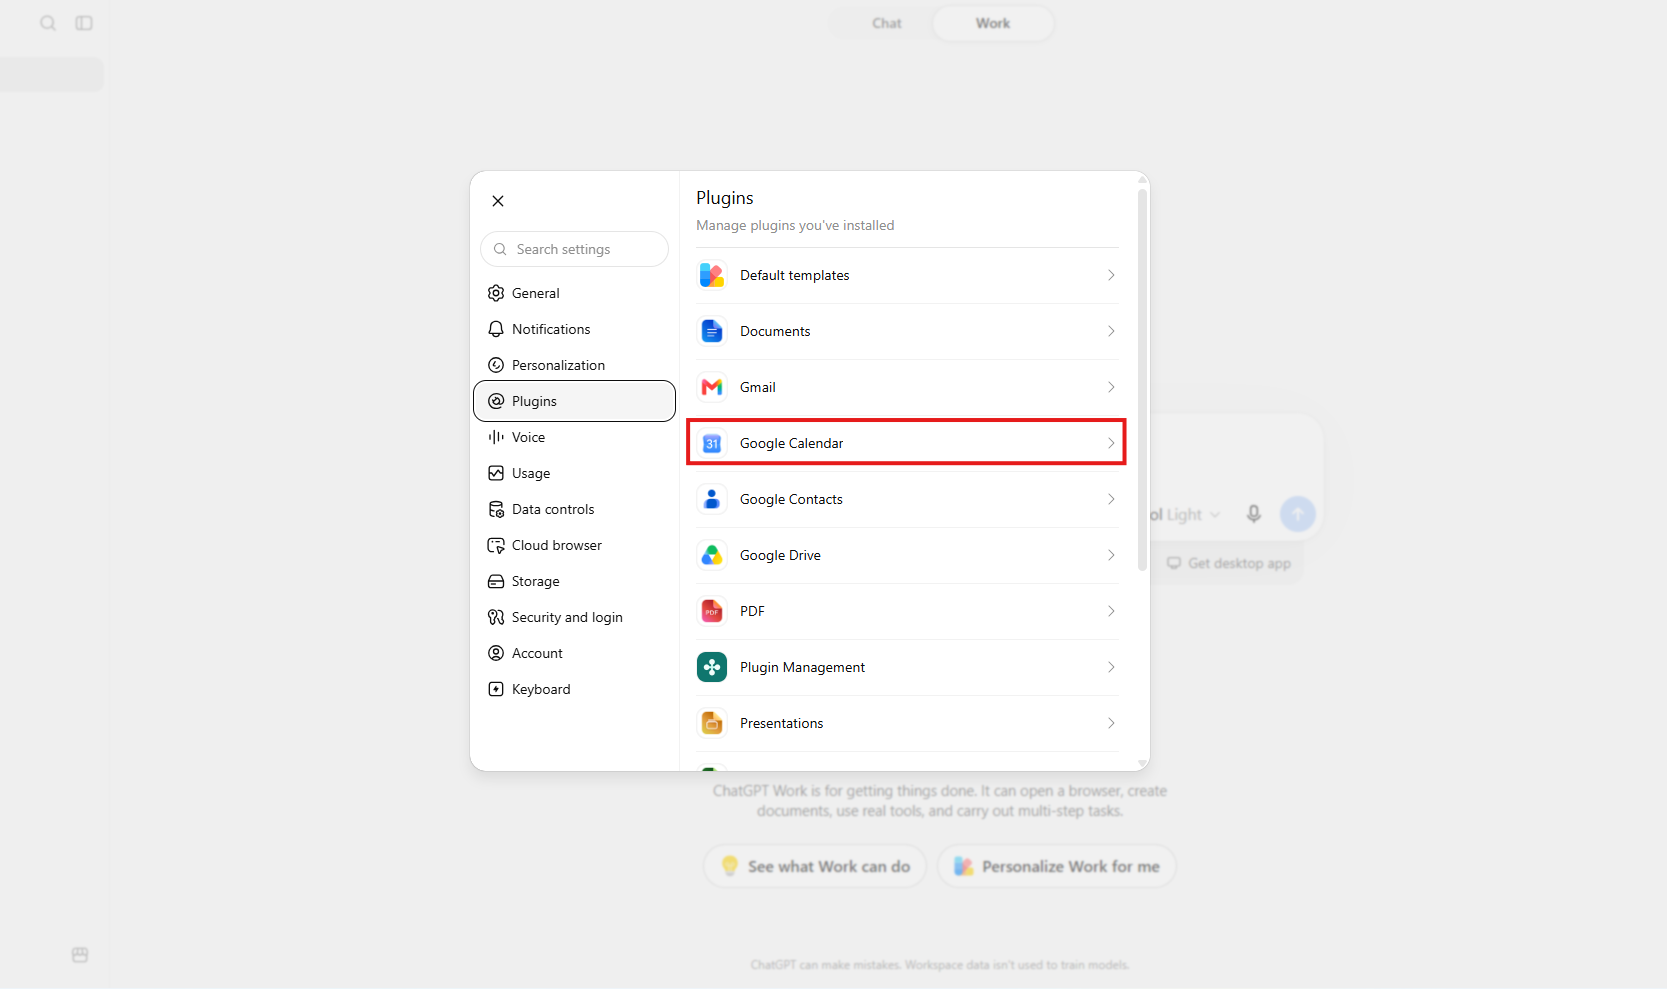
Step 5. Click on "Connect" to begin the authorization process.
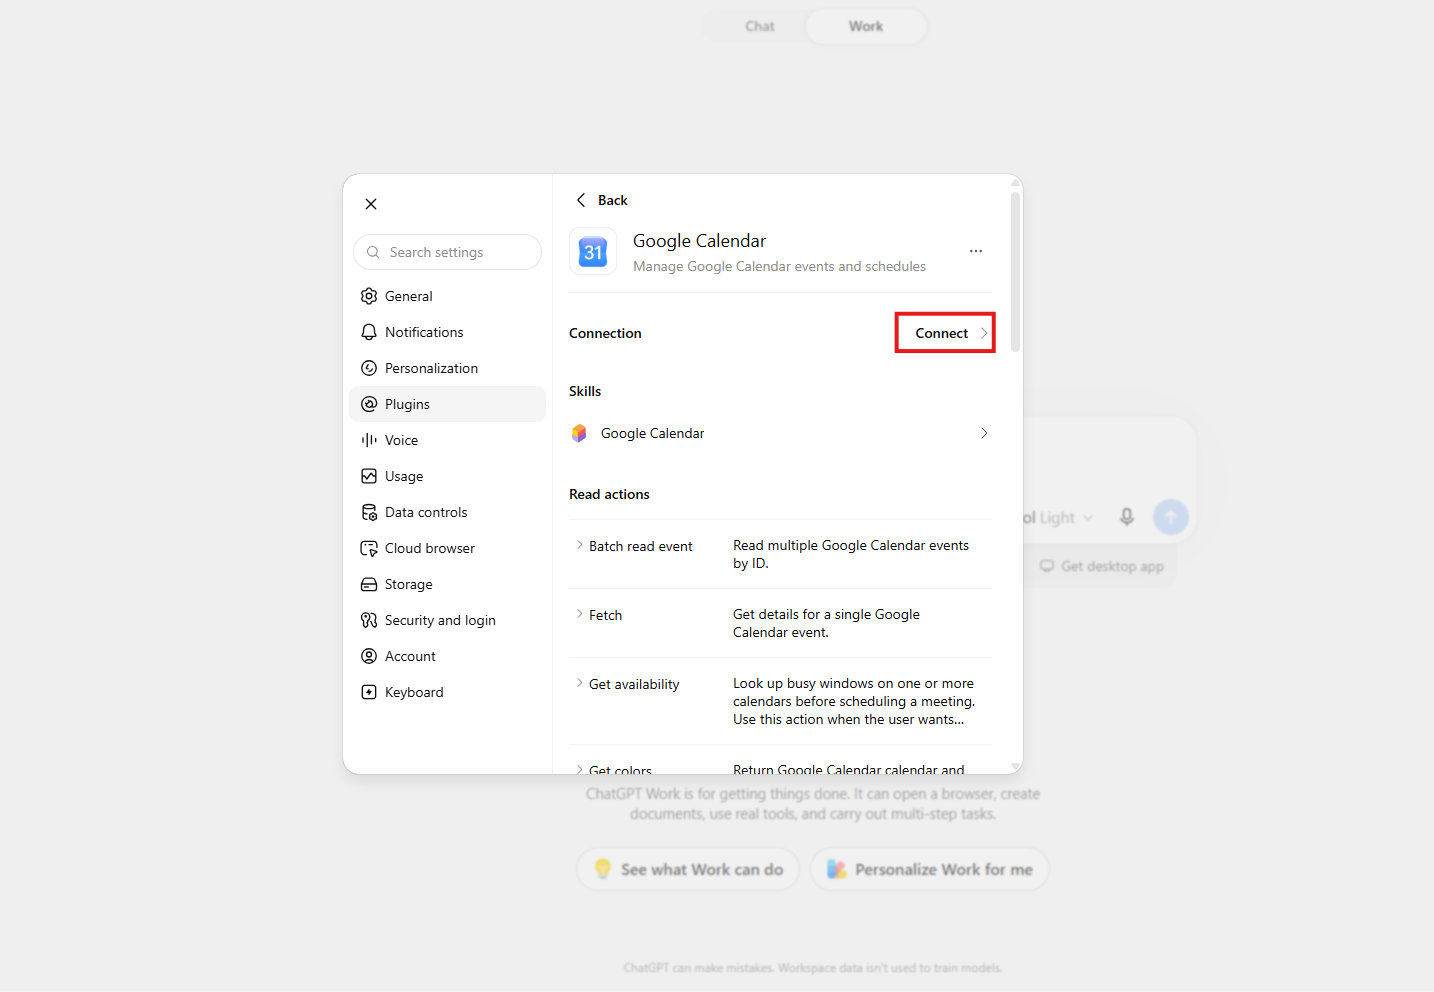
Step 6. Click "Continue..." to be redirected to source application, where you can provide your authorization.
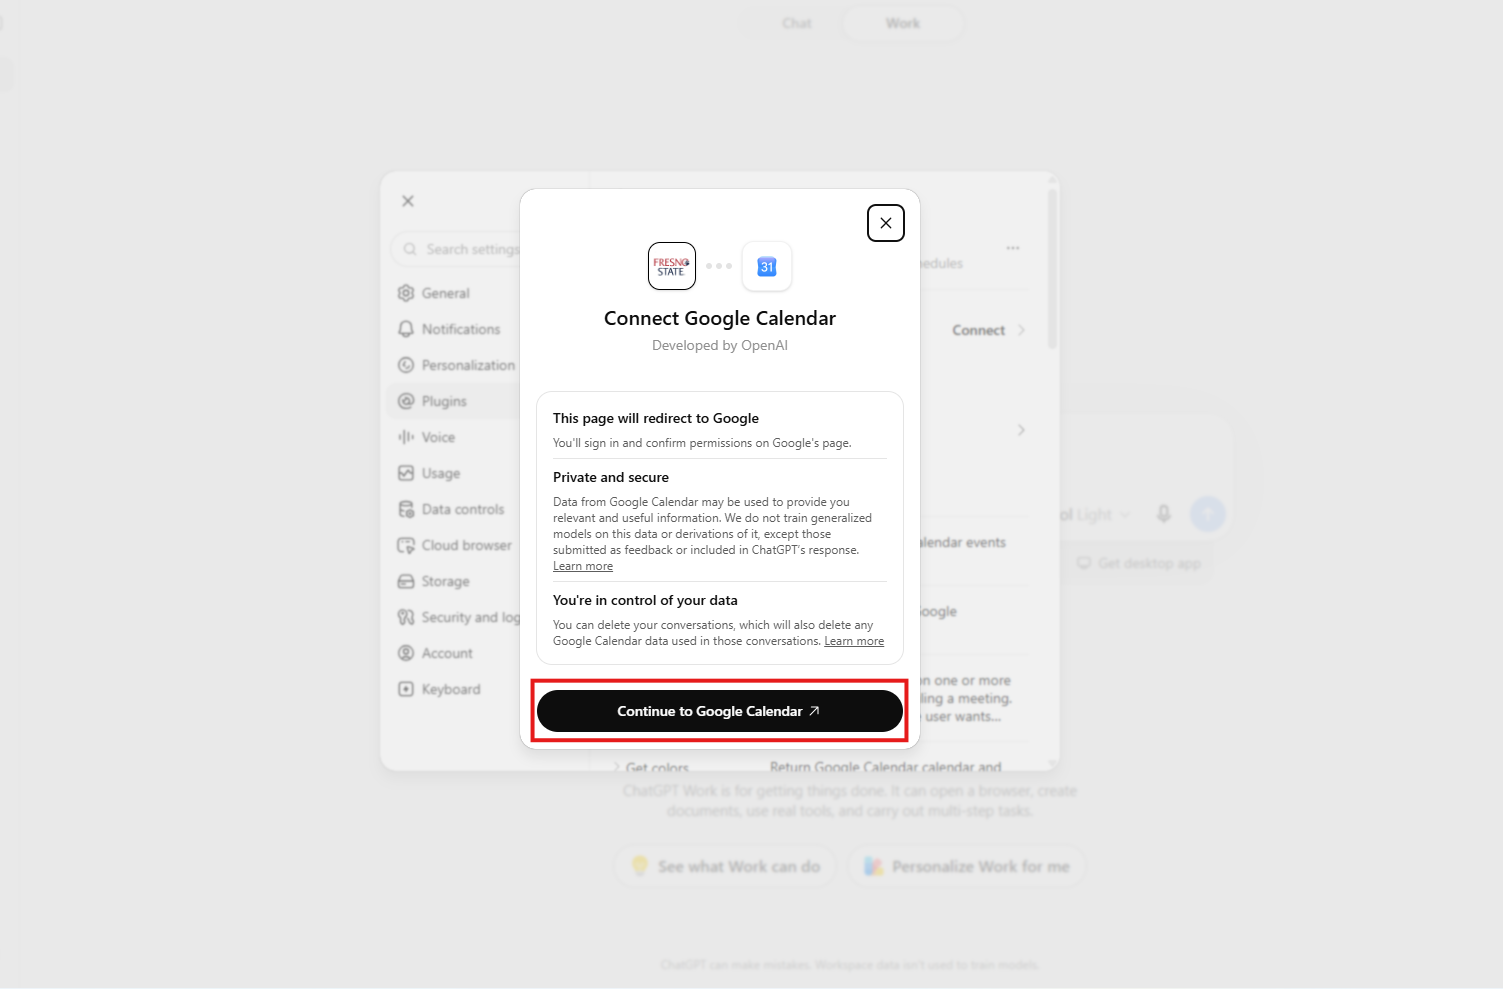
Step 1: You may see the prompt to connect to the plugin in your chat interface. Click on "Connect" to begin the authorization process.
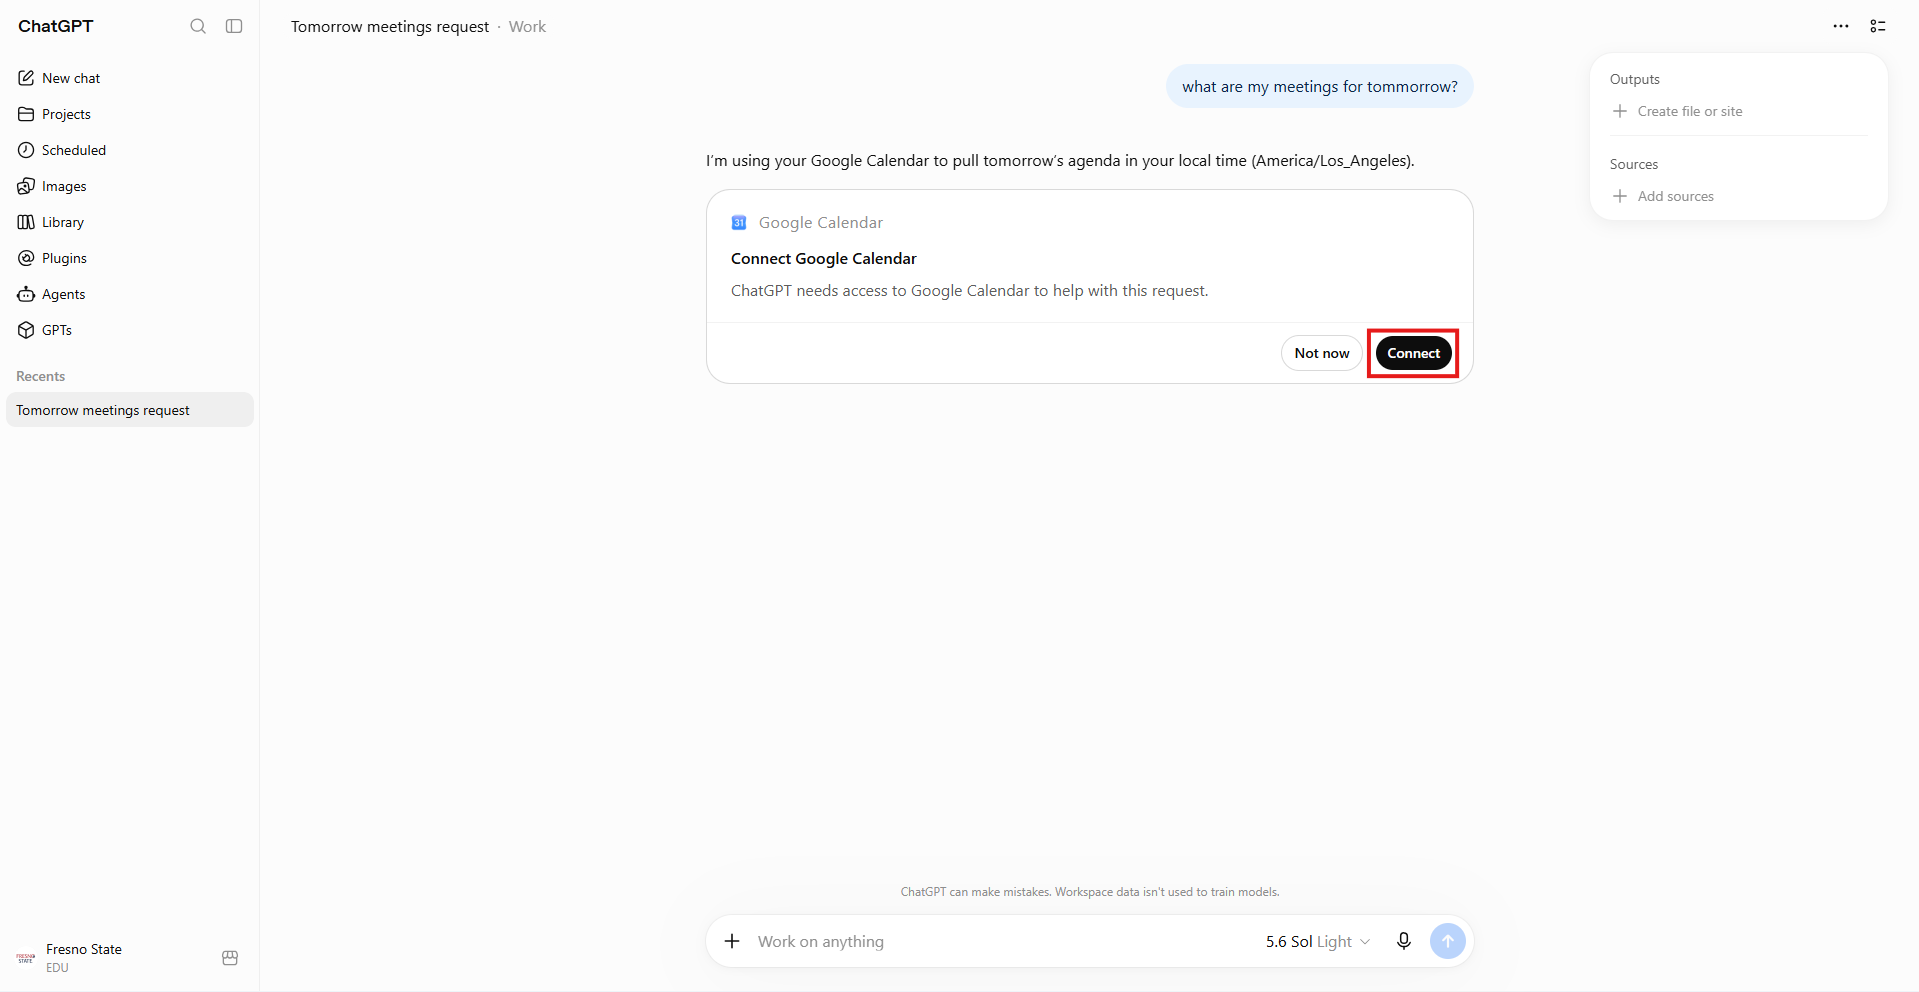
Step 2. Click "Continue..." to be redirected to source application, where you can provide your authorization.
How to Remove Plugin Authorization
You can remove a plugin’s authorization at any time if you no longer want ChatGPT to have access to your account through that plugin. Authorization must be removed through the source application, such as Google or Zoom, rather than directly within ChatGPT. This allows you to manage which applications have access to your account and revoke ChatGPT’s access when needed. Once access is revoked from the source application, the plugin will no longer be authorized to access your account.
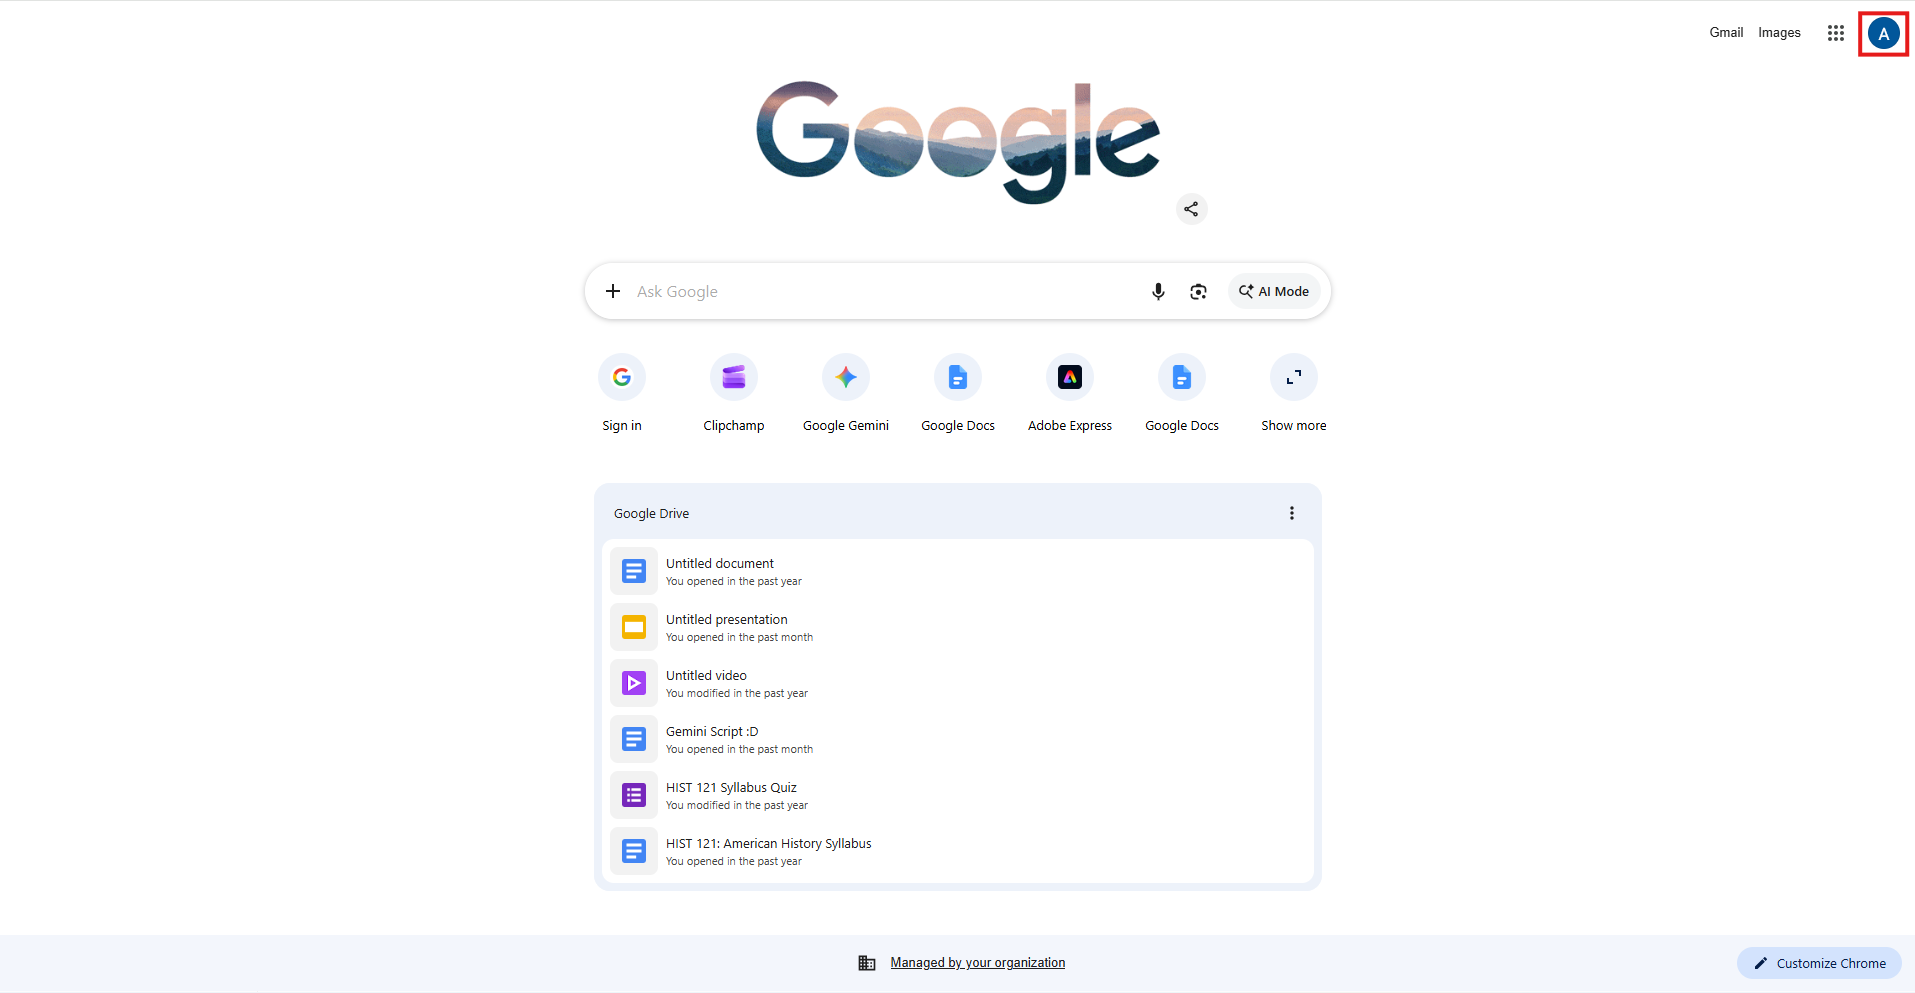
Step 1: Select your profile icon.
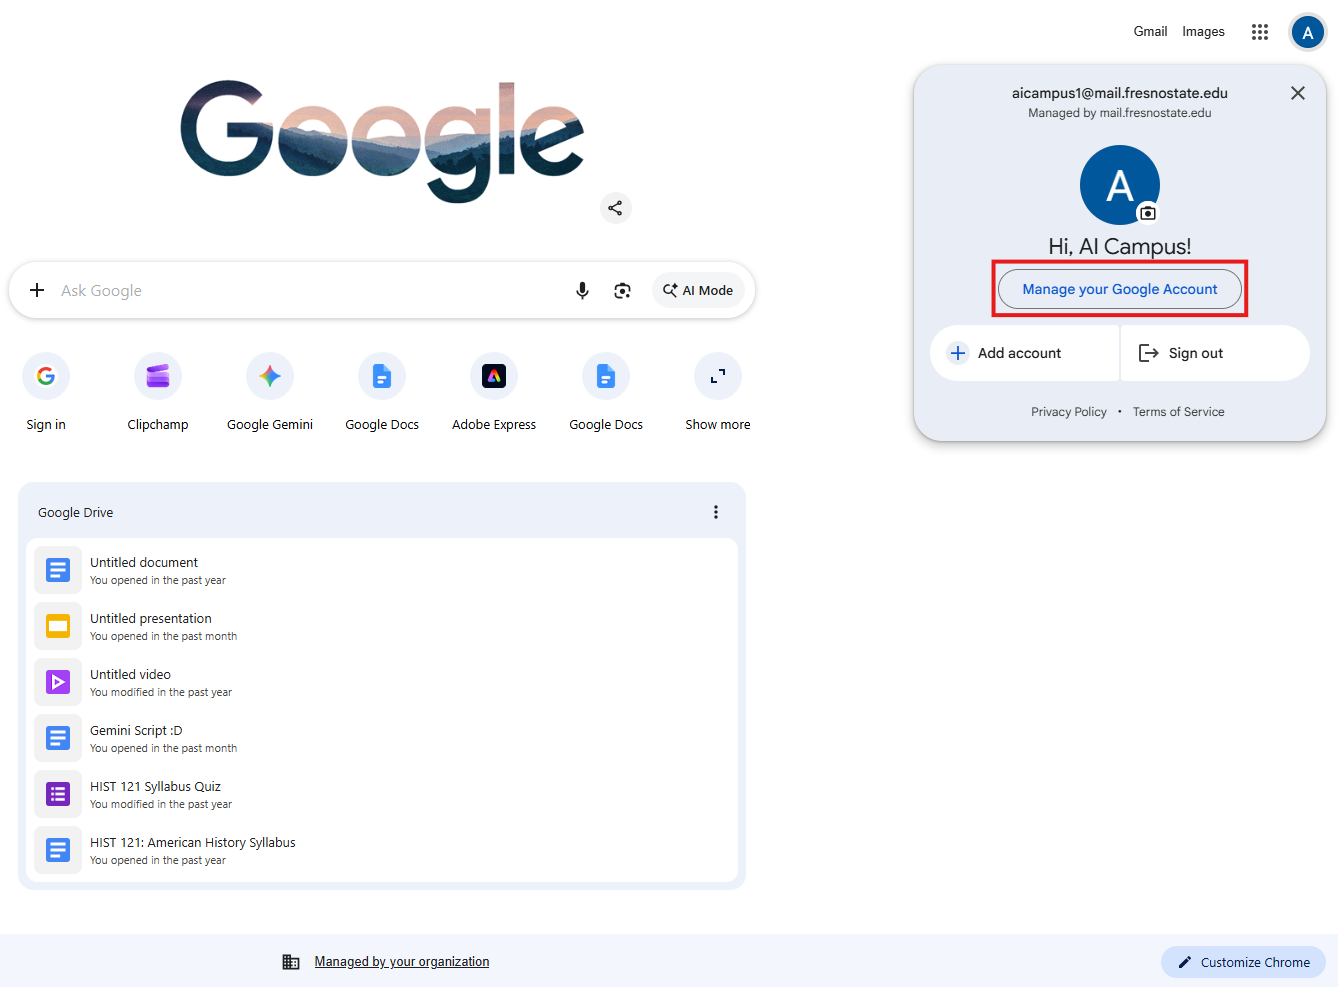
Step 2: Select "Manage your Google Account".
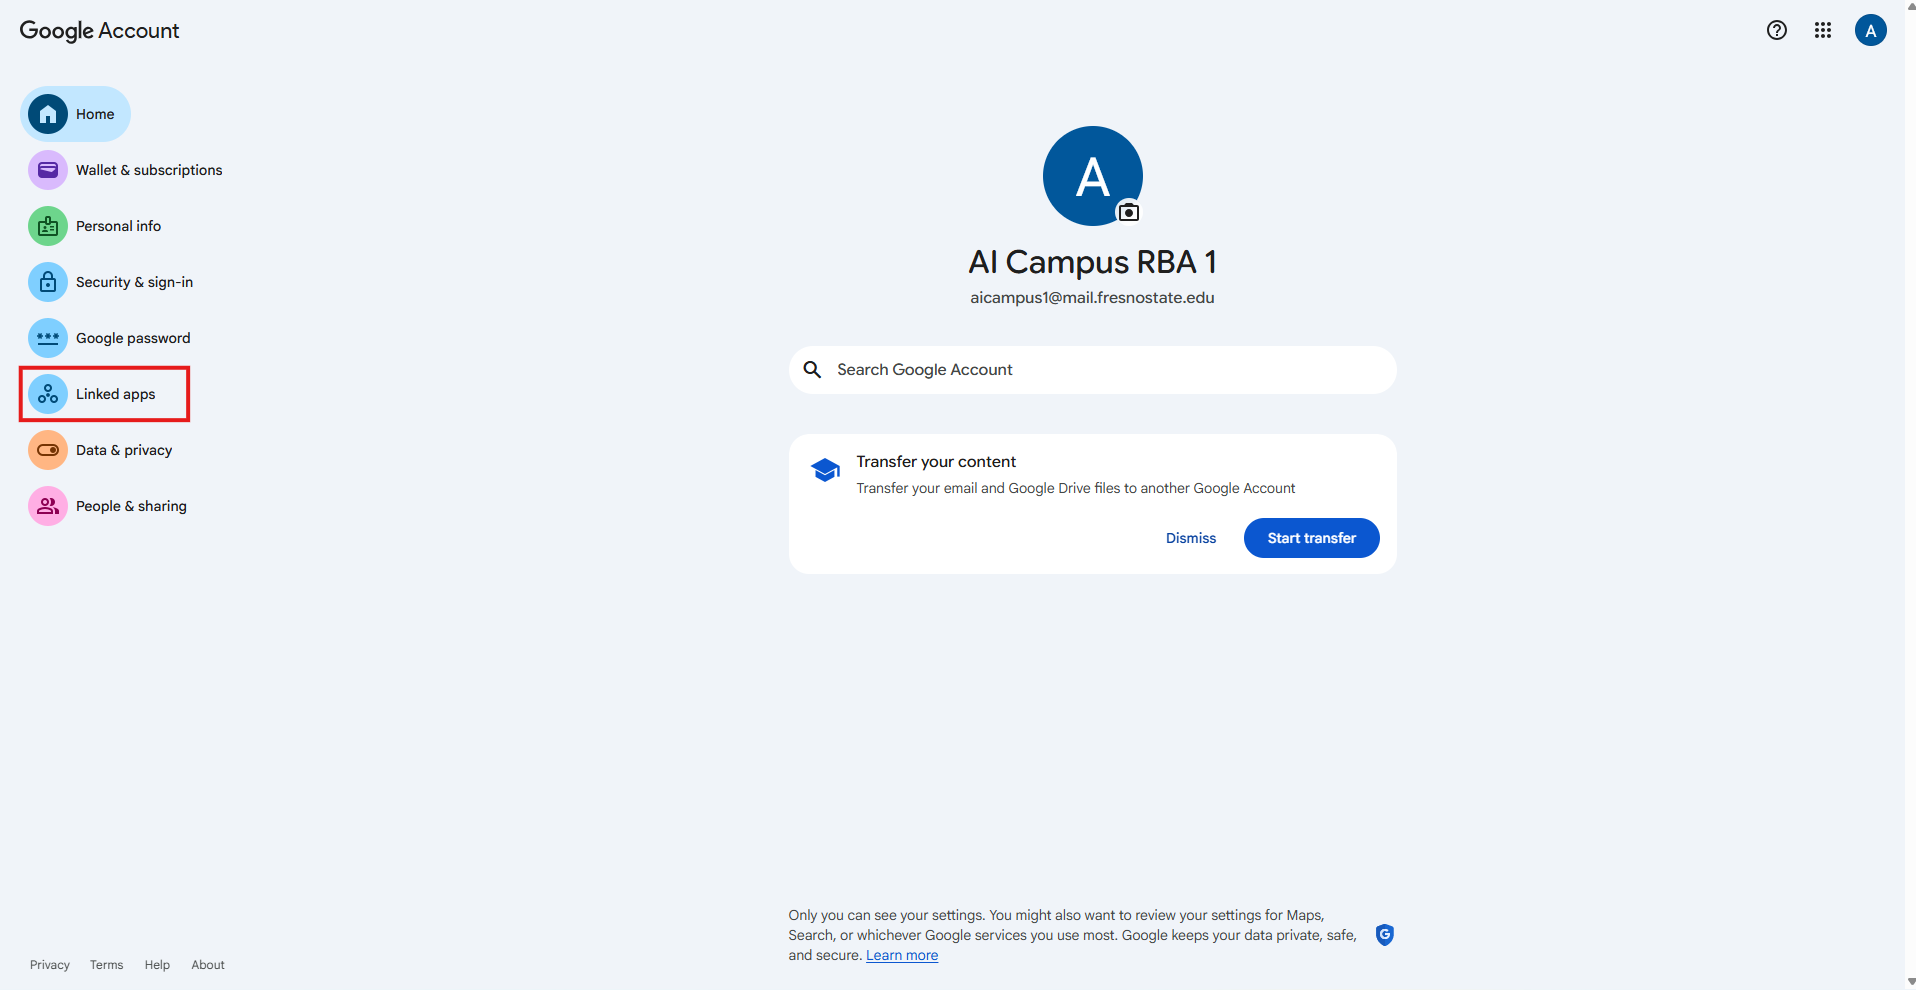
Step 3: Select "Linked apps" from the sidebar.
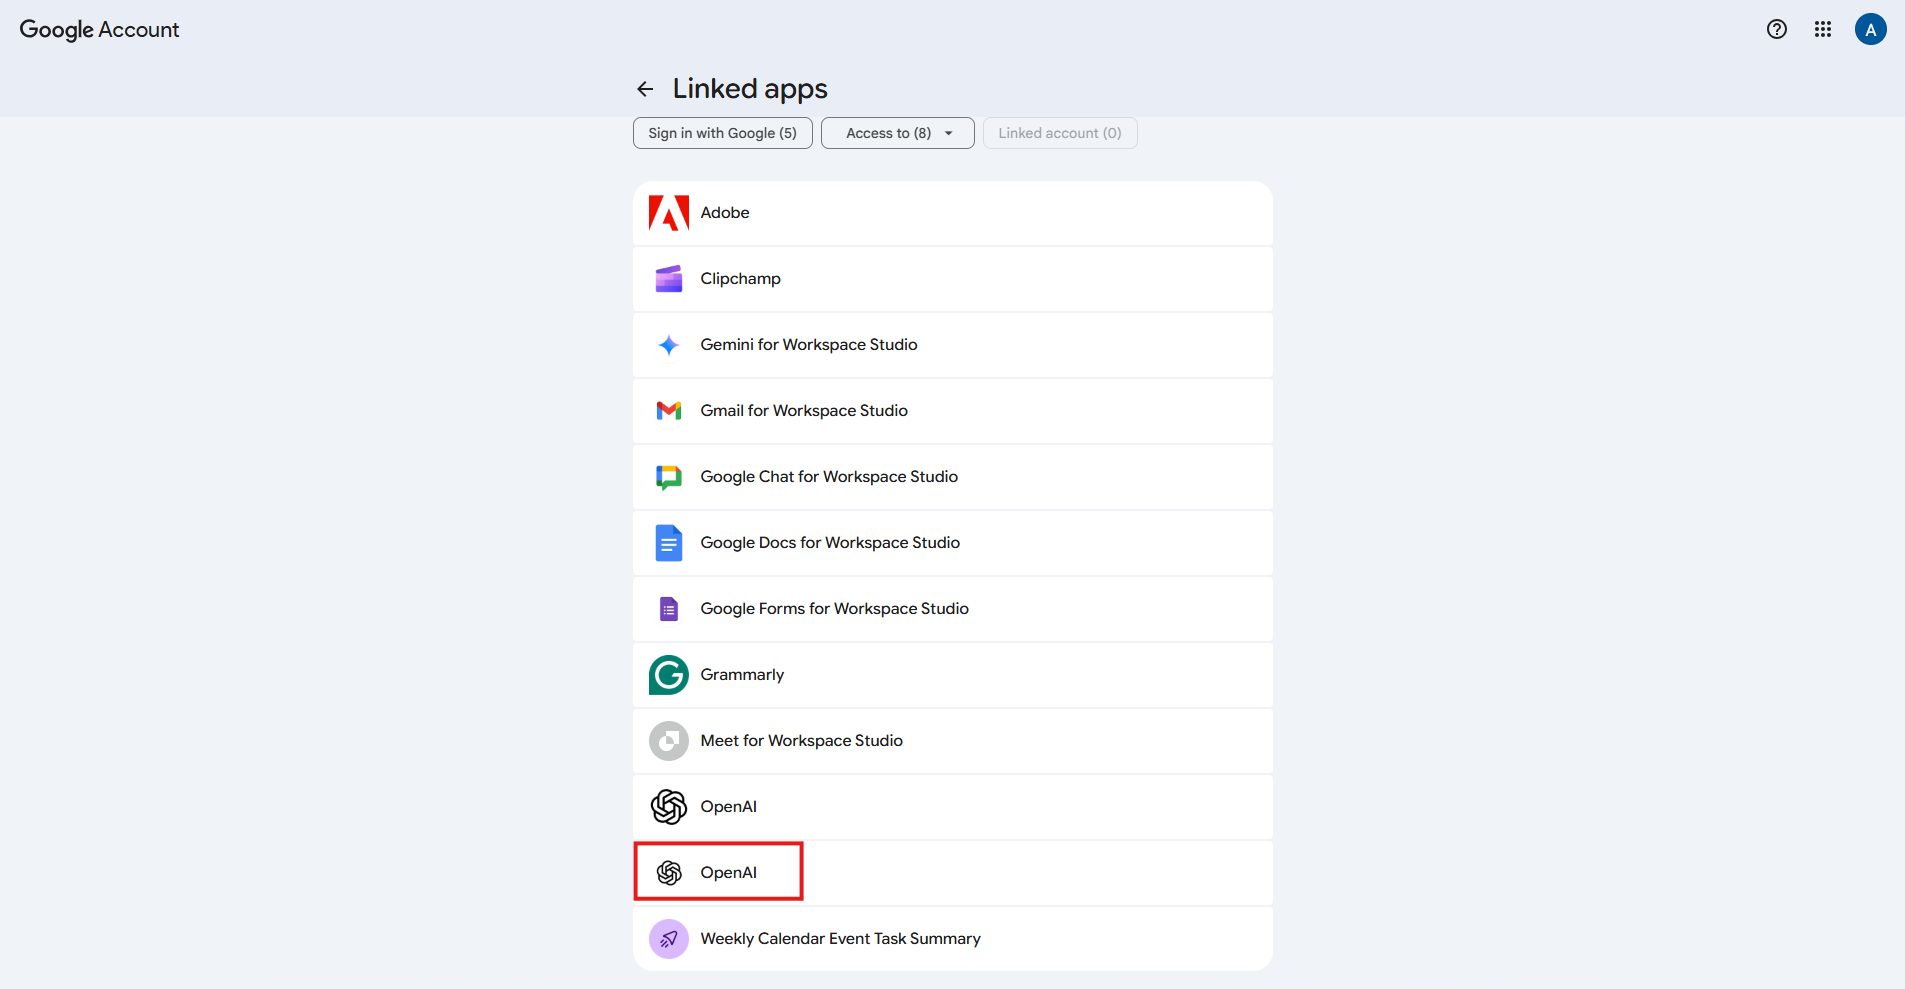
Step 4: Select OpenAI.
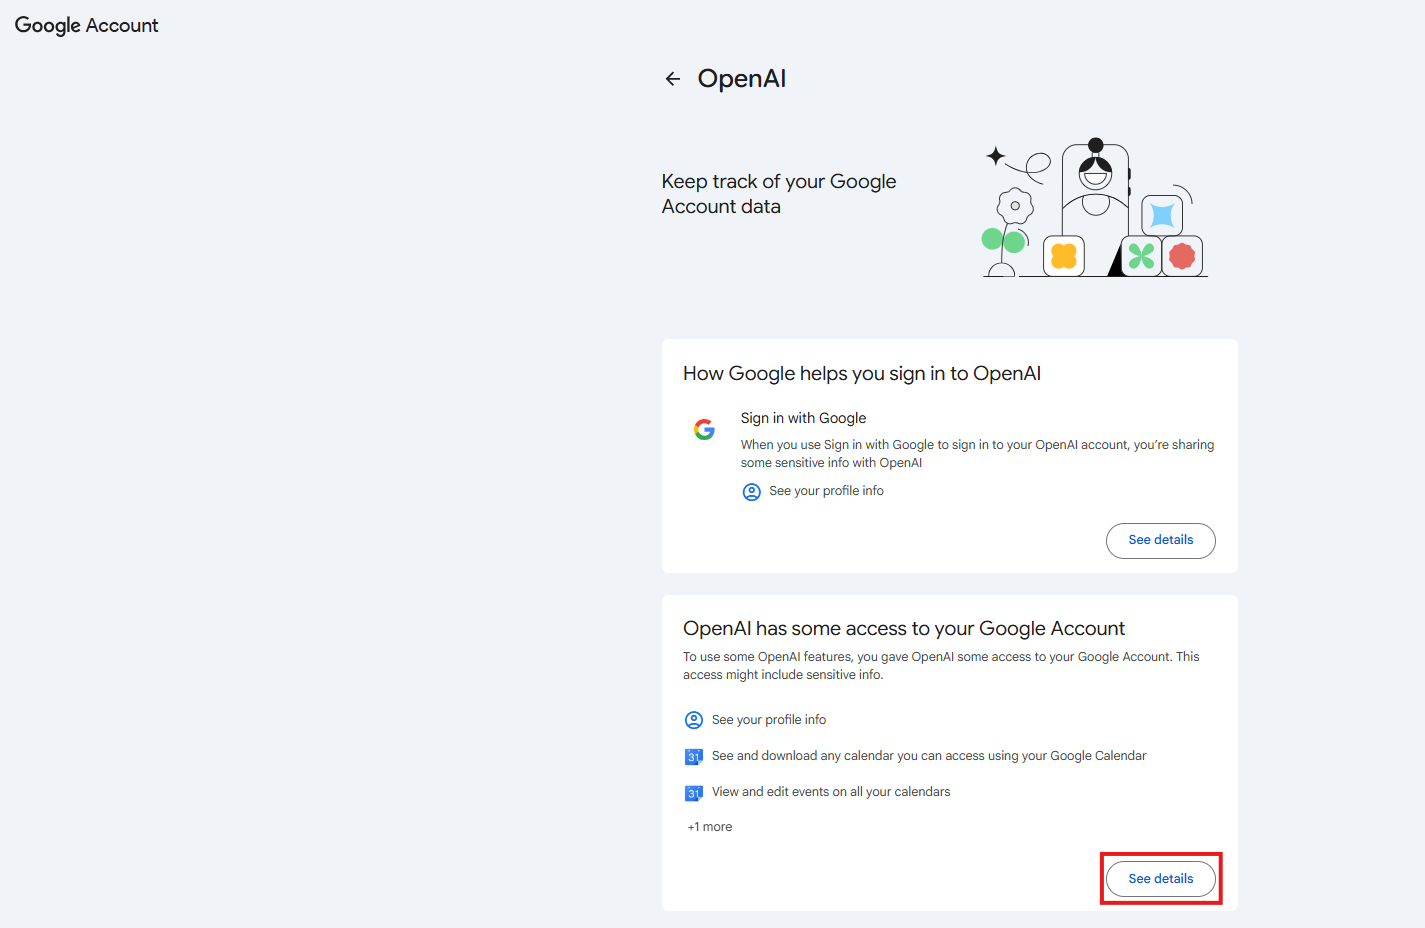
Step 5: Select "See details" under “OpenAI has some access to your Google Account.”
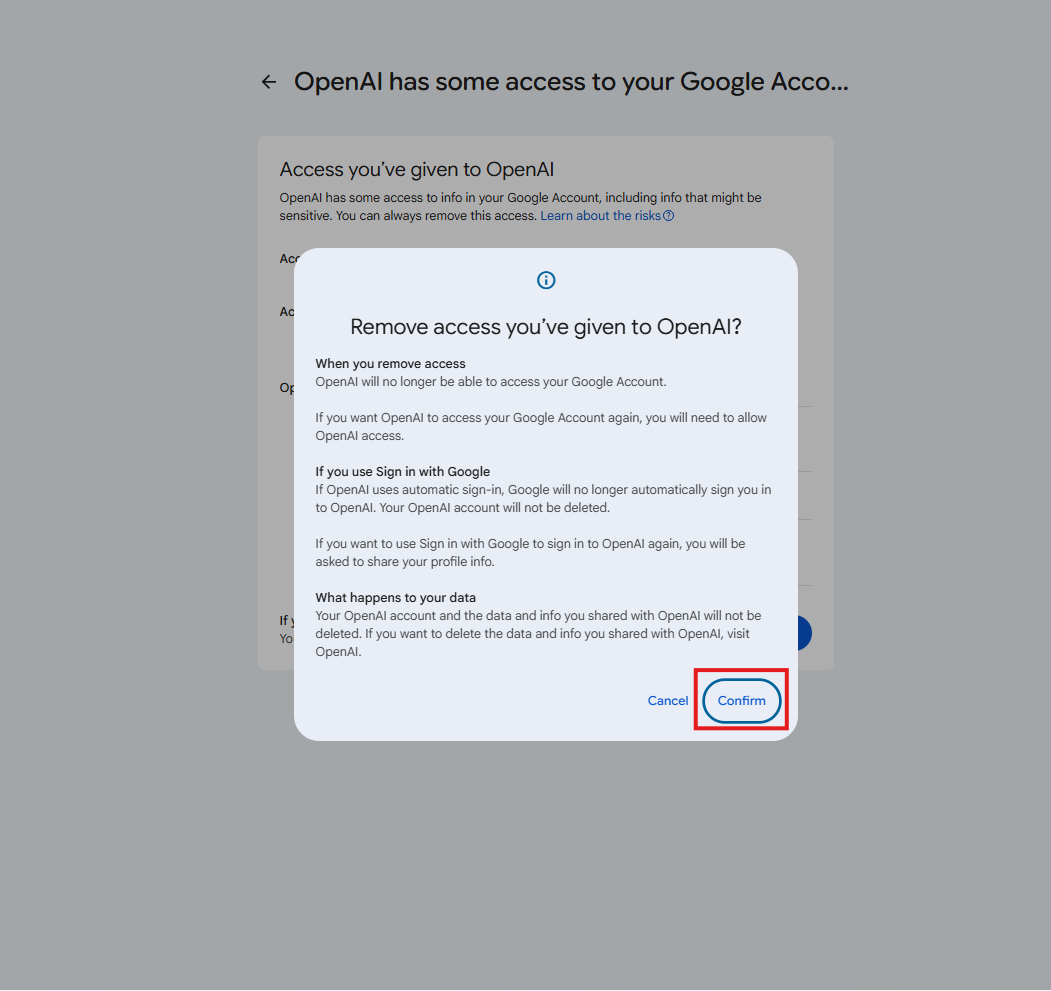
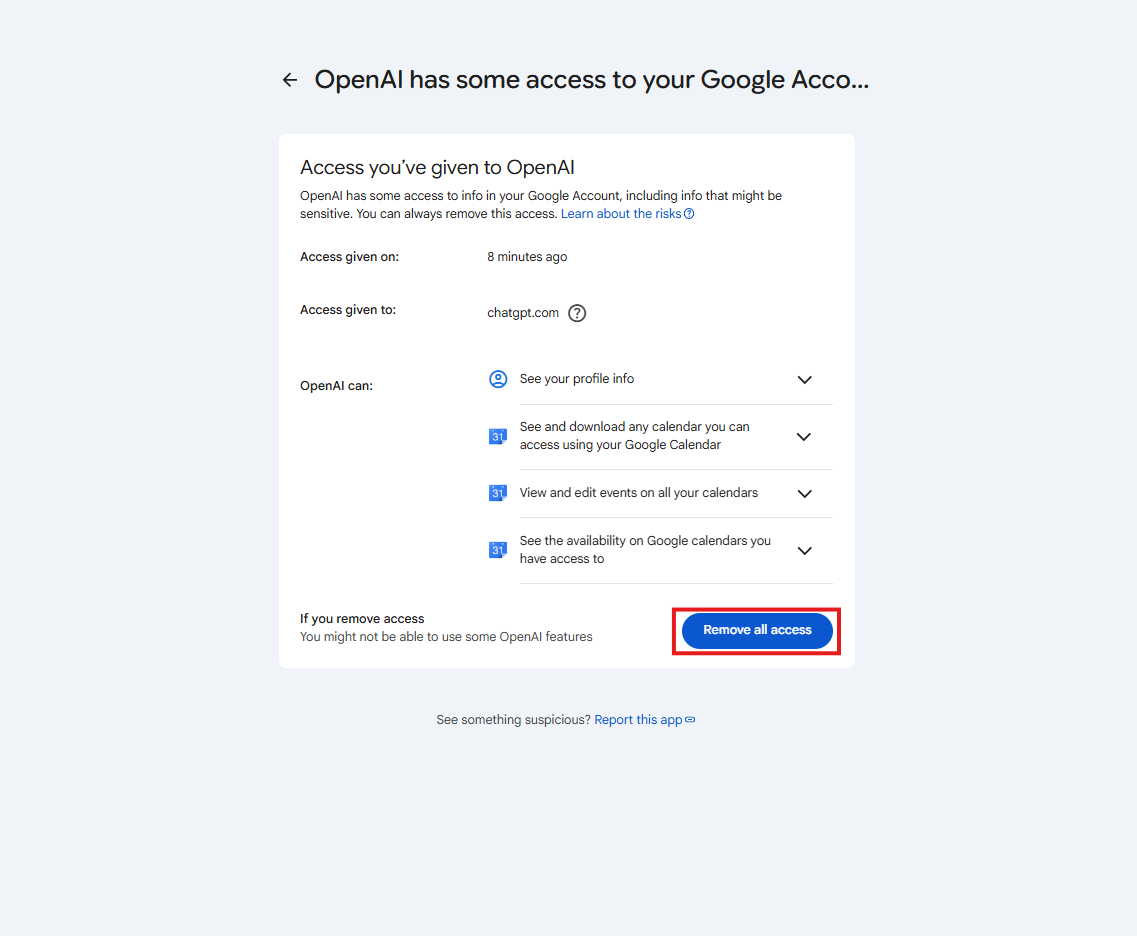
Step 6: Select Remove all access. Please note: This will remove access to all plugins in that application. Individual plugins cannot be deactivated separately. After access is removed, you must reconnect and authorize each plugin you want to use.
Step 7: Select Confirm to revoke OpenAI’s access.